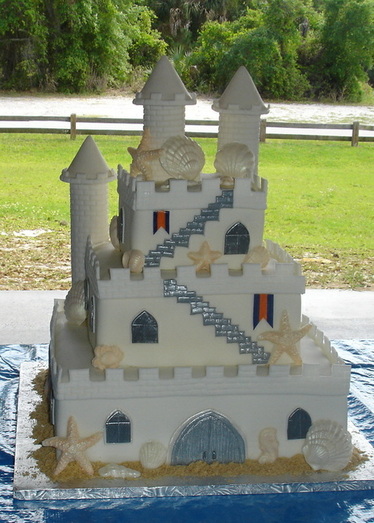
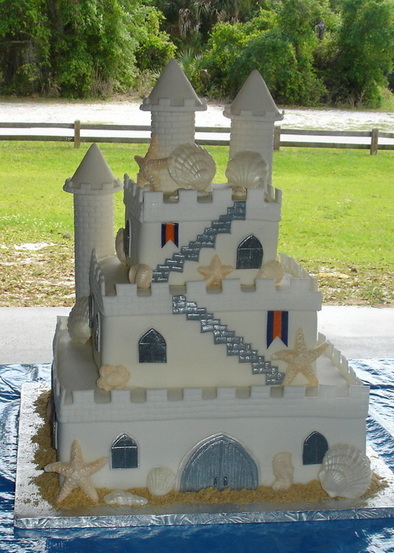
Well, the Sand Castle Wedding Cake was a big hit. I was quite happy with how well it came together. This cake had more detail work than any I have ever done, but I think it all turned out quite nicely.
I started the process about a week and a half before the wedding. I wanted to make sure that the castle turrets were good and hardened before hand, so I started by making those.
I started the process about a week and a half before the wedding. I wanted to make sure that the castle turrets were good and hardened before hand, so I started by making those.

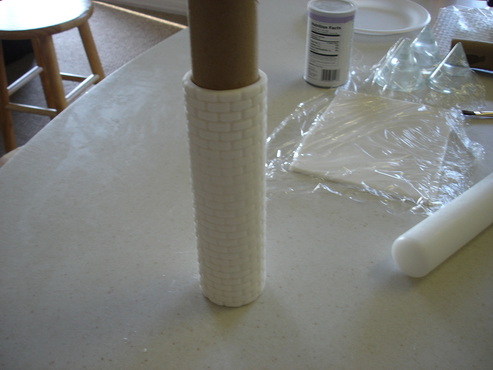
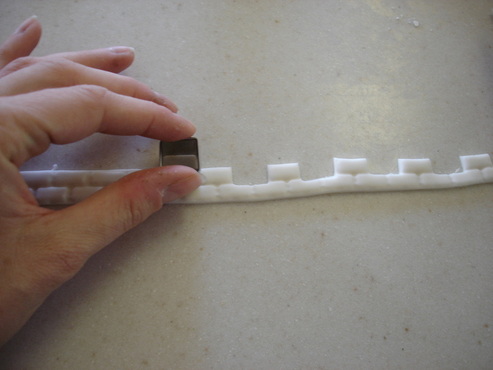
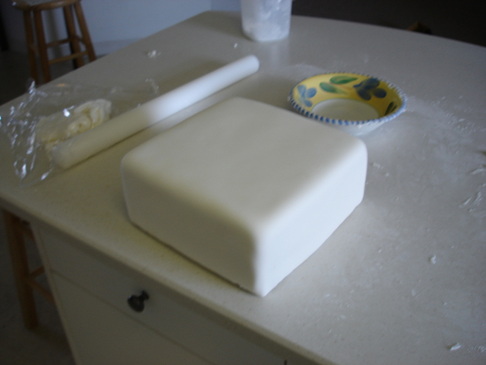
First I added a few pinches of gum tex to the fondant I was working with. The gum tex makes the fondant dry hard. I kneaded it in and rolled some out to experiment with the turrets.
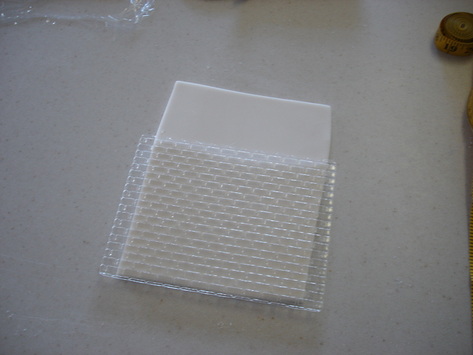
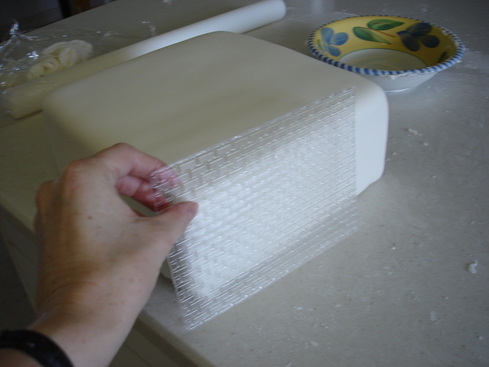
I cut the fondant into a rectangle, using a paper towel roll as a guide for how wide I needed it. The roll would eventually support the turret as it dried. Then I placed an imprint mat onto it and pressed the brick pattern into the rectangle.
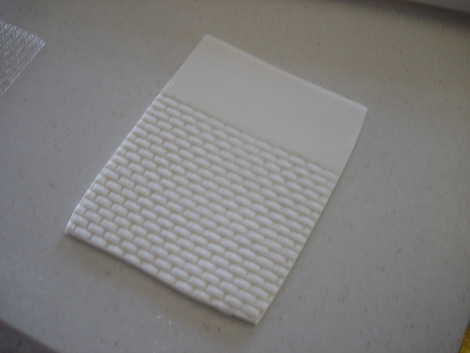
I then wrapped the rectangle around the roll and sealed it's edges with water. I mostly just worked the edges together by pressing on them with my fingers. There was a seem in the back of the turret, but I knew it would be back facing, so I didn't worry about it. Then I set the turrets aside to dry. I actually ended up making 5 so I had backups in case something happened to them.
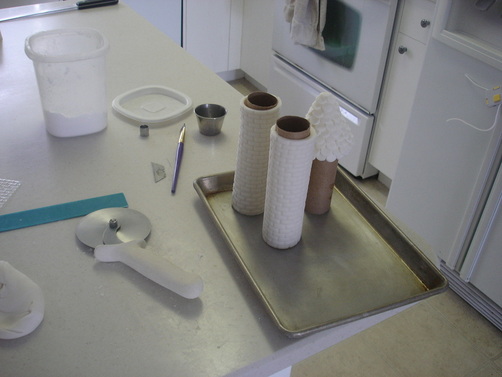
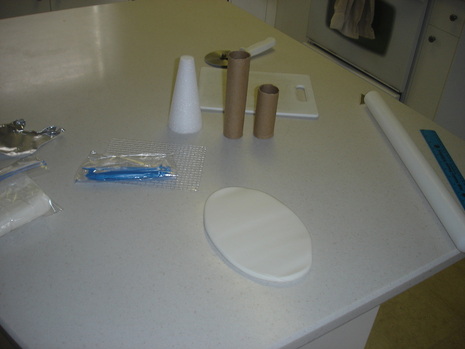
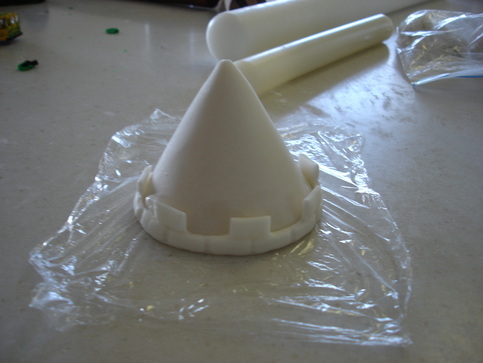
I wasn't sure how I was going to do the top of the turrets, so I experimented with a few ideas. I first took a Styrofoam cone and cut it down to the size I wanted. Then I covered that with fondant and experimented with using small cut out circles as individual tiles. In the end I didn't like how it looked. It looked more like a tree, than a building. So I abandoned it and came up with another idea. The picture above shows the top that I discarded standing by two turrets.
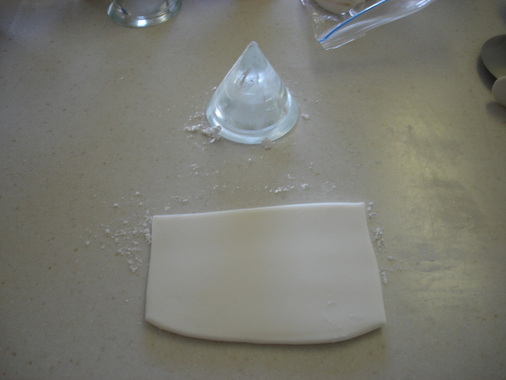
Then it occurred to me that I have these great candle holders which, when inverted, were just the right size. So I decided to try those as a base for the towers. I cut out some fondant and wrapped it around the candleholder (after thoroughly cleaning the candle holder, of course). I dusted it with powdered sugar to keep the fondant from sticking.
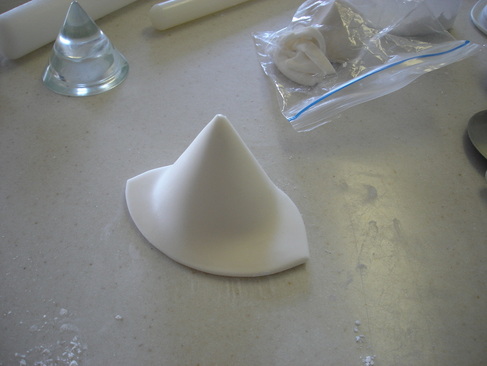
I wrapped the fondant around instead of trying to lay it over. This also left a seam in the back, but again, I wasn't concerned about that.
Then I trimmed off the bottom and had a great start to my towers.
Then I trimmed off the bottom and had a great start to my towers.

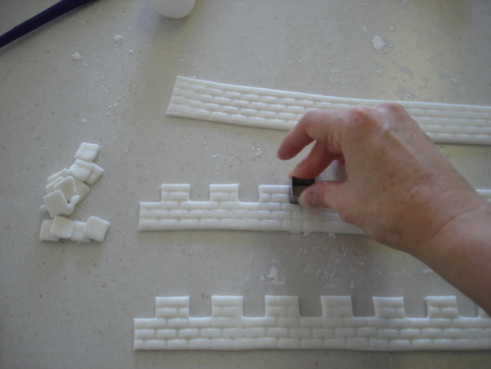
They really needed a bit more than just the cone, so I made some brick decoration to go around the edges. I fastened them to the cone after the cones had dried pretty well, again using water.
I failed to keep track of how much time this cake took (which was probably a good thing, because it took a LOT of time). Now that the turrets were ready to go, I was able to relax until three days before the wedding, when the baking began.
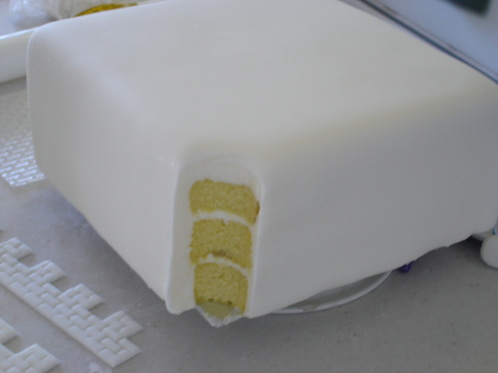
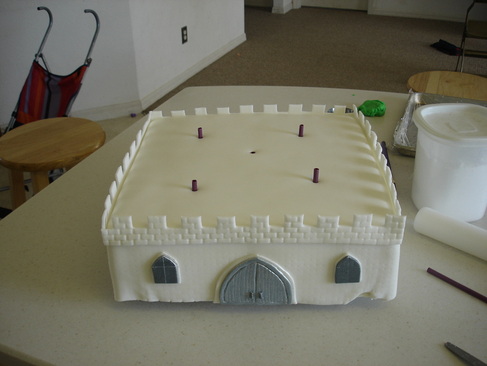
I baked and assembled three square tiers, sizes 6, 10, and 14 inches, and covered them with fondant (see my baking page for more details on baking).
I pressed my brick pattern into the sides of the cake which left a very faint brick laying pattern on the sides of the cake. Since the wedding was outdoors, I didn't trust the fondant to hold together if it was hot, so I opted not to piece together sides with a heavier pattern on them.
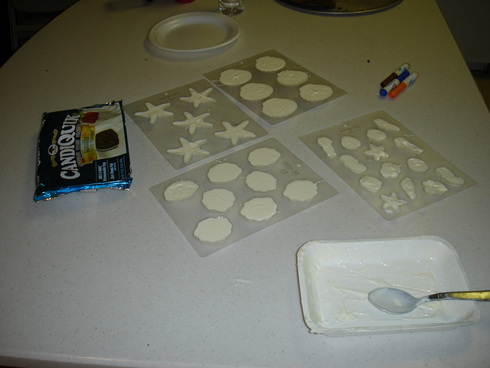
I also melted candy to mold into the shells that would be used for decorating the finished cake.
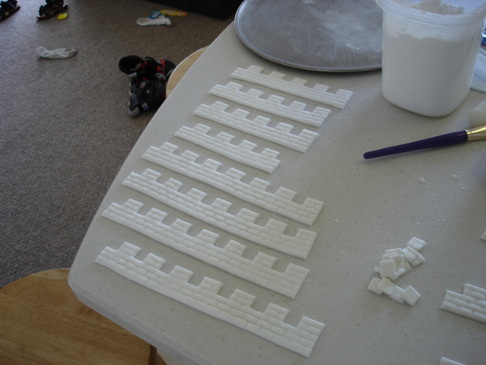
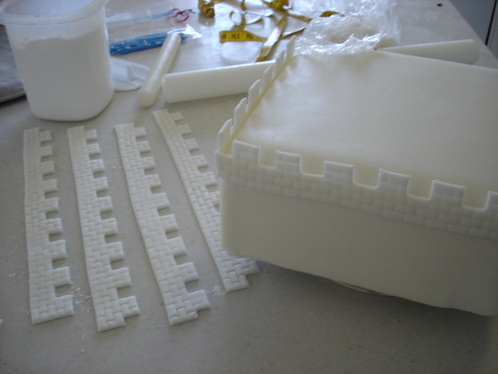
Next I started making the decorations that would adorn the cakes. I started with the bricks that would cover the tops of the cakes. I made enough to cover all three cakes.
Then I cut out the corners of the top two cakes. This was because I wanted to set the turrets into the cake to make them look more realistic. This was the hardest thing I've ever done to a wedding cake. I felt like I was ruining it. :-) There was something so wrong about cutting away a perfectly good corner of a beautiful ready made cake. It went against everything I've learned so far. But knowing it was necessary, I went ahead and did it. It was quite simply done. I just used a circle cookie cutter to cut a nice round edge. It worked great. The perk of this was that my 4 year old and I got to sample both cakes (one was lemon with raspberry filling and the other was chocolate with raspberry filling). They were both delish! I used a piece of saran wrap to cover the exposed corner so the cake didn't dry out.
Next I went ahead and attached the brick edges to the tops of the cakes (using water and a paint brush).
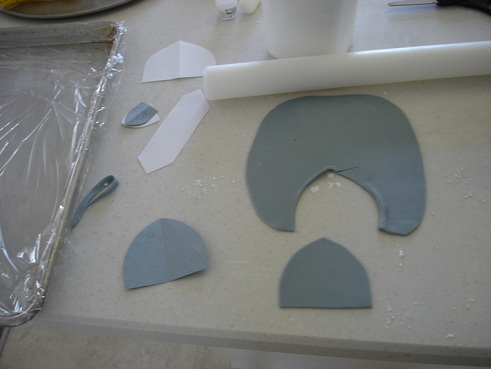
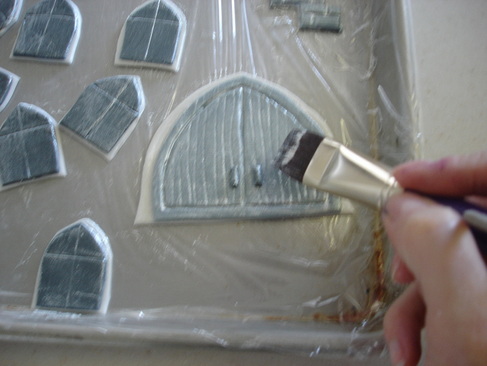
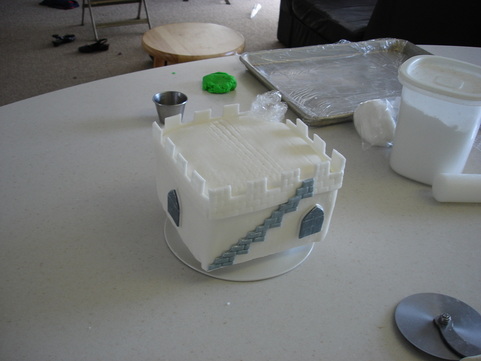
I then made the windows, door, and stairs.
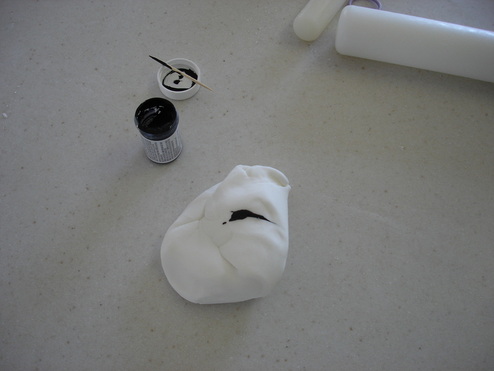
After dying the fondant, I made paper cutouts of the shapes that I wanted.
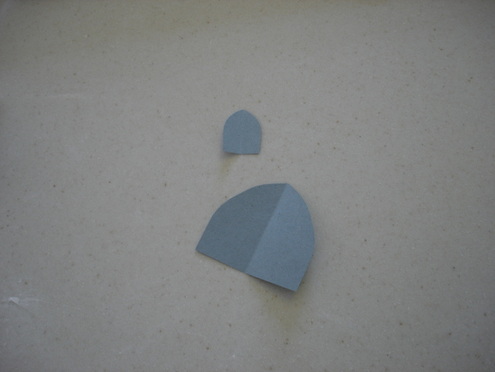
Then I started cutting out the door and windows.
I used a blunt tool to mark the details of the doors and windows.
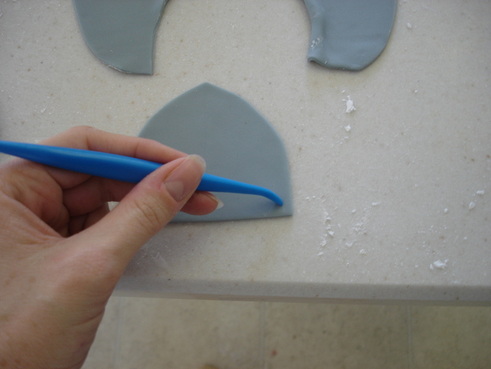
I wanted to give the windows a bit of depth, so I raised them up with white fondant backgrounds.
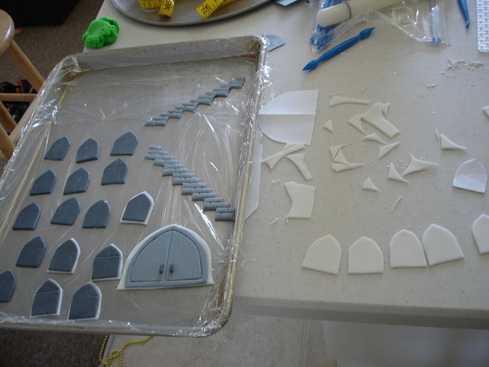
Finally I gave them a light brush over with an edible silver paint.
After placing on the decorations, I added plastic dowels to the cakes to support the weight of each tier. This time, after measuring them, I left them slightly above the cake, so I could more easily place the tiers on each other. It didn't work as well as I'd hoped. You can also see in this picture that I messed up the fondant on the bottom of this tier. I gouged it way to short when trimming and had some wrinkles. I didn't worry about them though because I knew I'd be covering them up with decorations later.
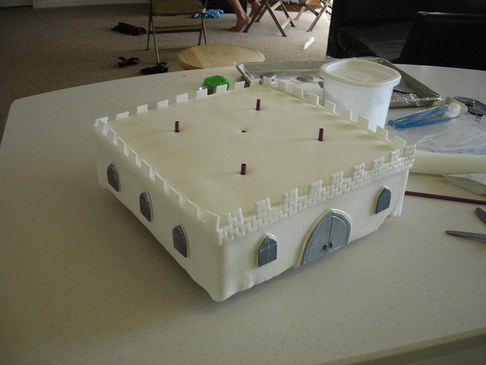
Next I added the details and dowels to the other tiers...
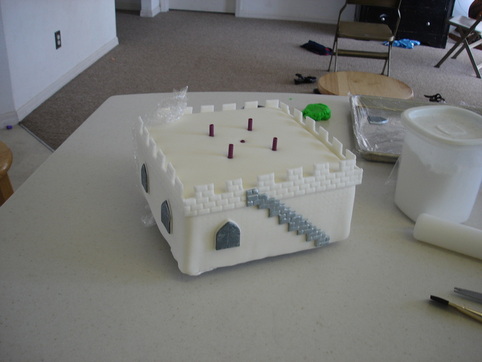
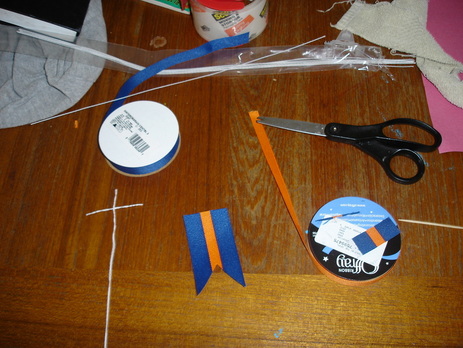
I struggled with how I would incorporate the wedding colors into the cake. The bride and groom are Gator fans and chose the traditional gator colors, bright blue and orange. However, the bride was clear that if I couldn't figure it out, she didn't mind not having the colors. I wanted them represented though, so I made small flags out of ribbon and fastened them onto the cake.
Lastly, I painted the shells light shimmery colors and ground up Nilla Wafer Cookies to imitate sand. I also made a batch of royal icing so I could attach the turrets at the event.
I didn't take pictures as I assembled the cake, but here's how it went: First I stacked the tiers on top of each other (I always assemble at the site, just to be safe). Then I used royal icing and dowels to attach the turrets into place. Lastly, I added the cookie sand and candy sea shells, and my sand castle wedding cake was complete.
I didn't take pictures as I assembled the cake, but here's how it went: First I stacked the tiers on top of each other (I always assemble at the site, just to be safe). Then I used royal icing and dowels to attach the turrets into place. Lastly, I added the cookie sand and candy sea shells, and my sand castle wedding cake was complete.
 RSS Feed