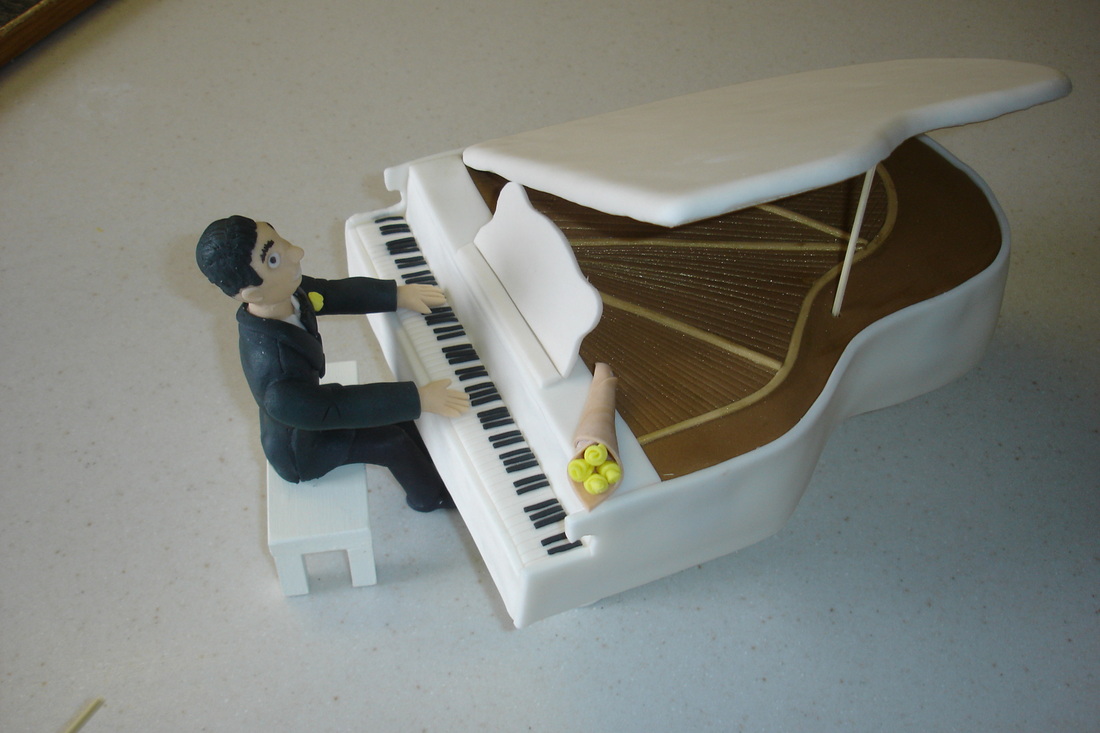
I was asked to make this piano cake for a friends wedding. They had made their own cupcake tower and wanted the piano for the top tier.

The groom's mom made me this stand. I had a photo of a piano cake that I liked and so, in true Brandi fashion, I set to work copying a cake that I really had no idea how to make.
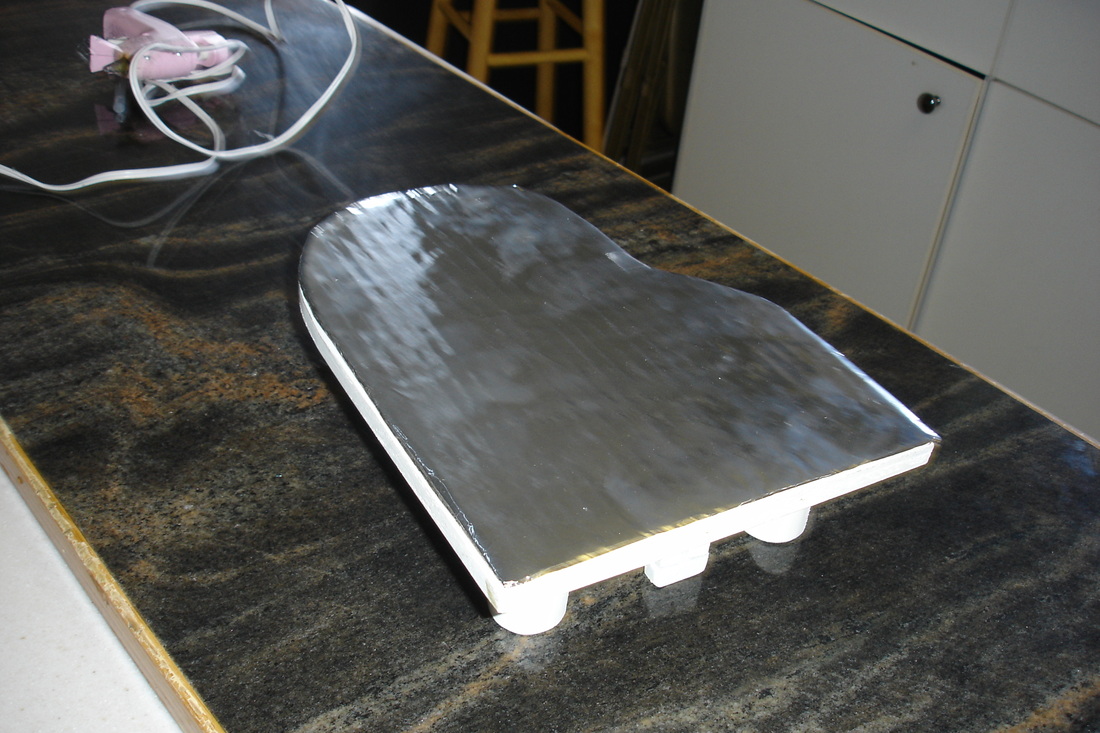
I started by hot gluing a cardboard covered with foil to the stand.
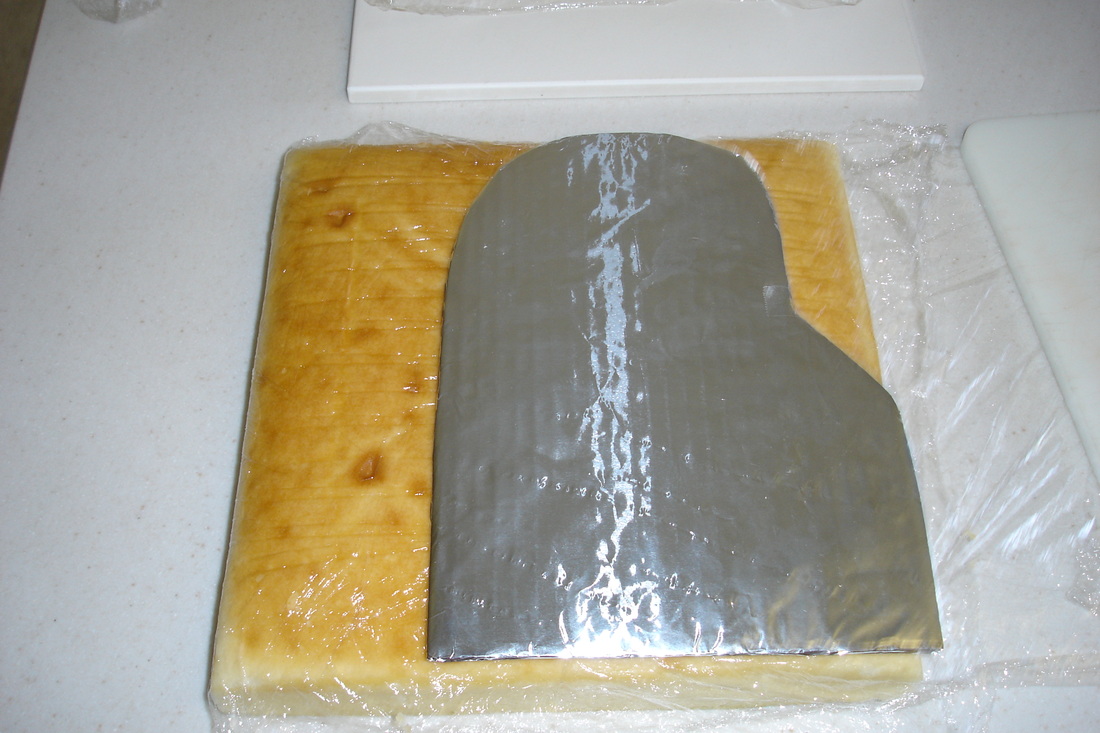
The stand was nearly 12 inches in length. So I baked two 12 inch square cakes. This was enough cake for the piano (and enough left over for my kids to do their summer cake making project).
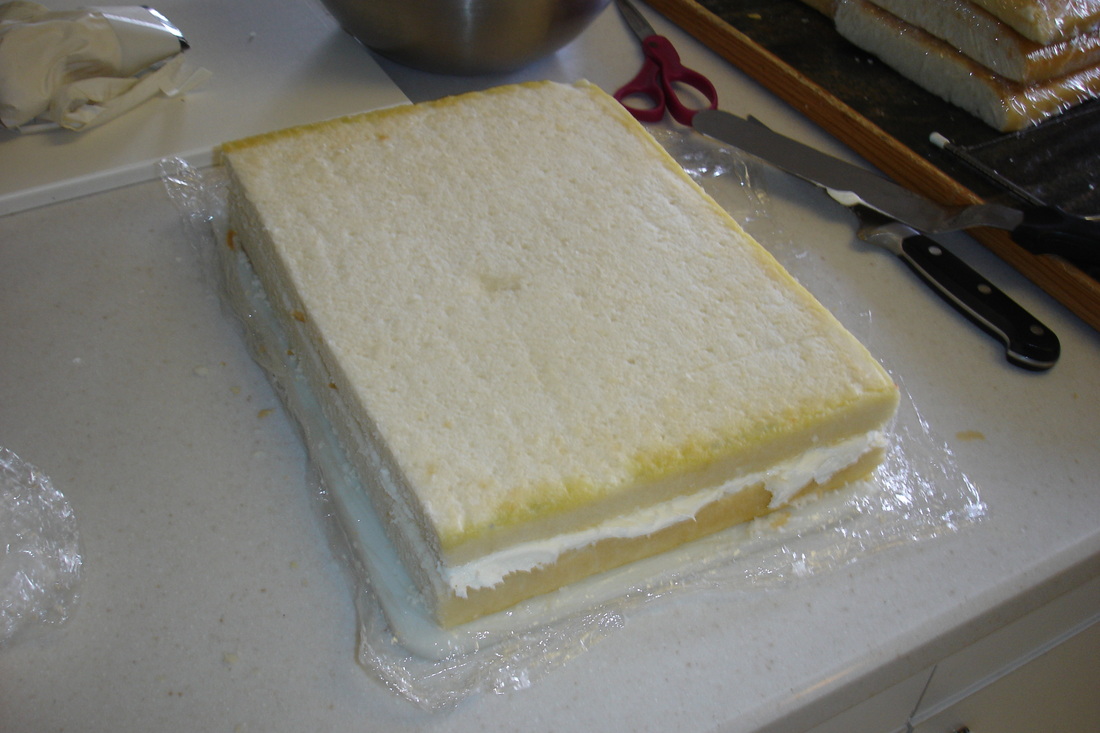
This wasn't a very thick cake. I wanted the proportions to be as realistic as I could get them. It probably would have been smarter to only make one thick layer but I wanted some butter cream in the middle to make the cake taste better. As is, the two layers ended up too thick so I cut another 1/2 inch of cake away from this to get the height that I wanted.
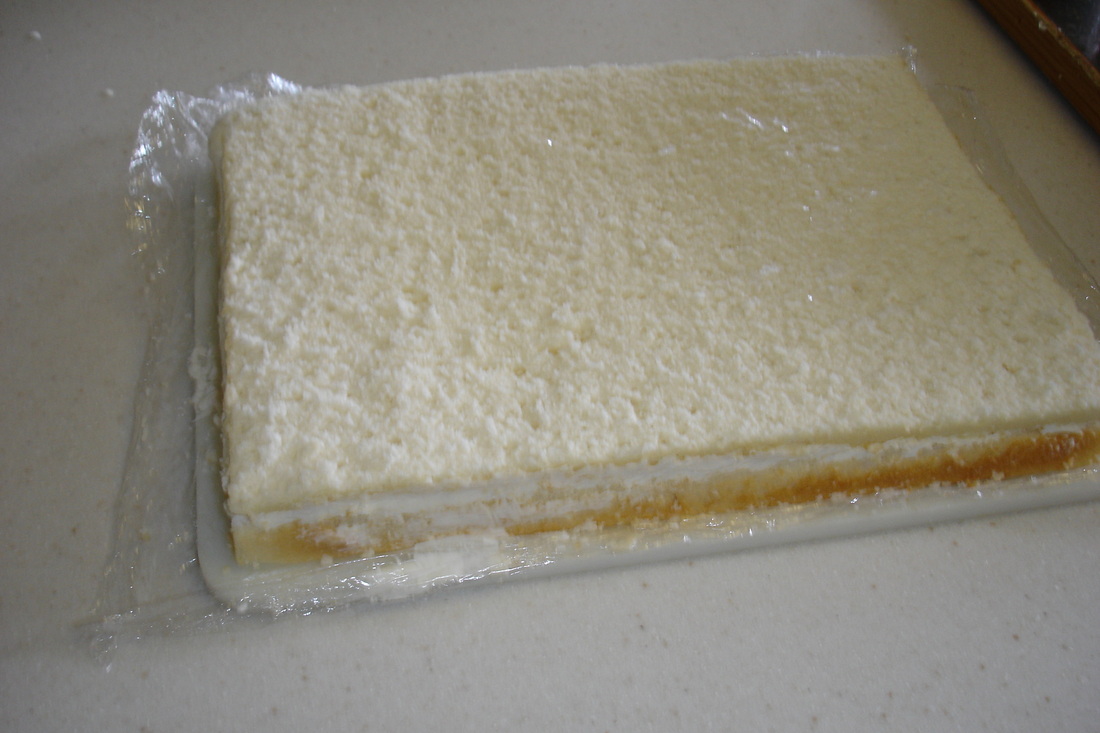
I let the cake firm up a bit in the freezer, and it was ready to cut.
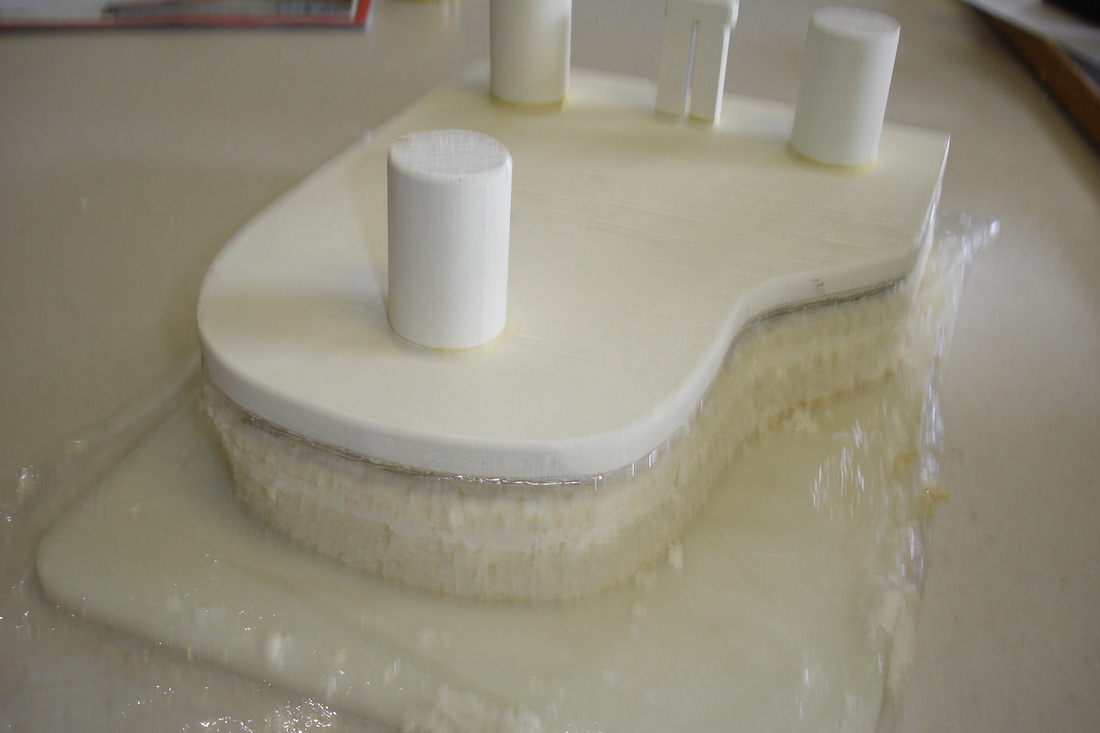
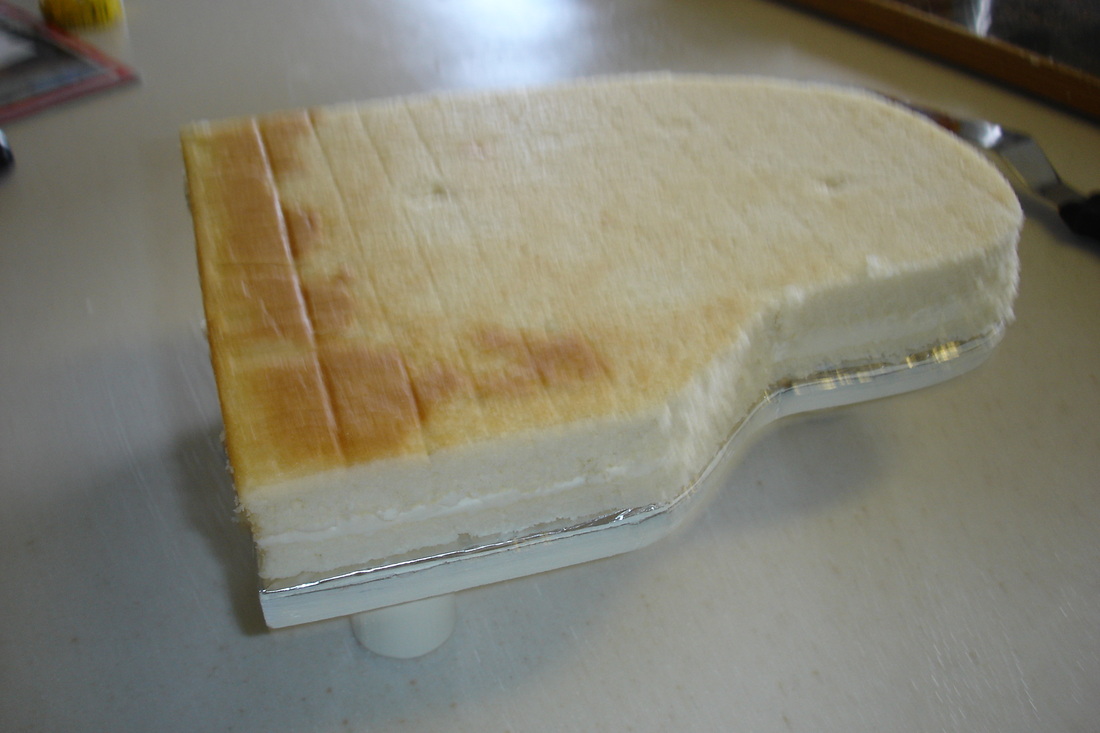
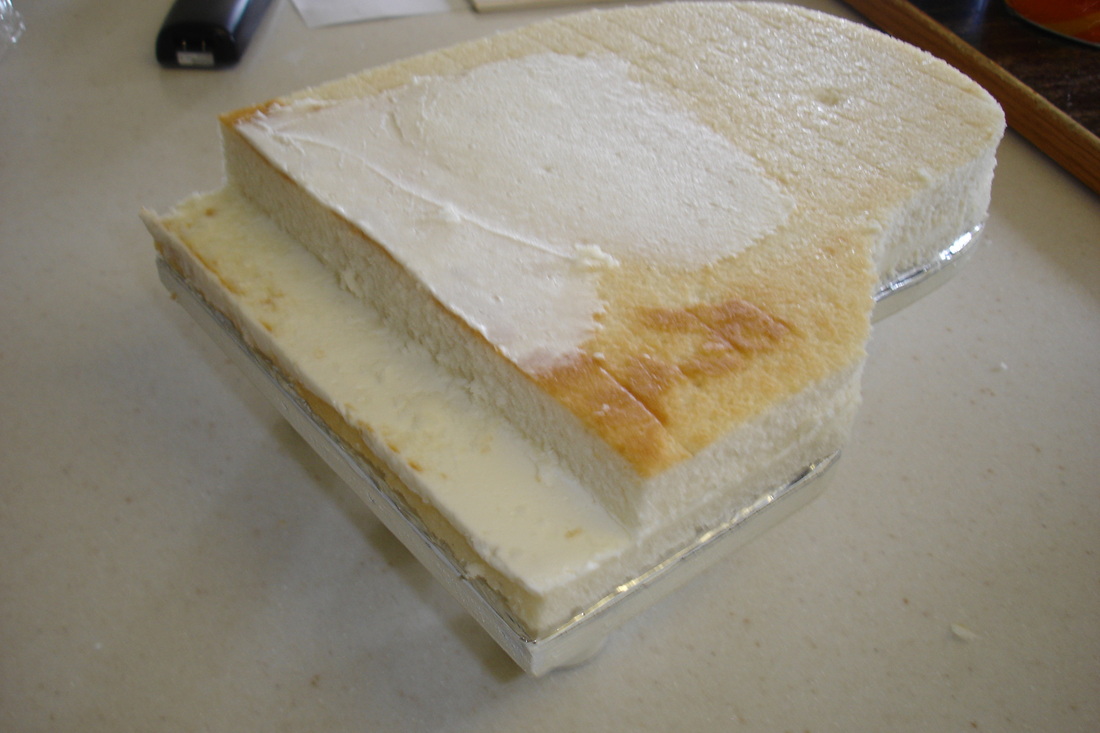
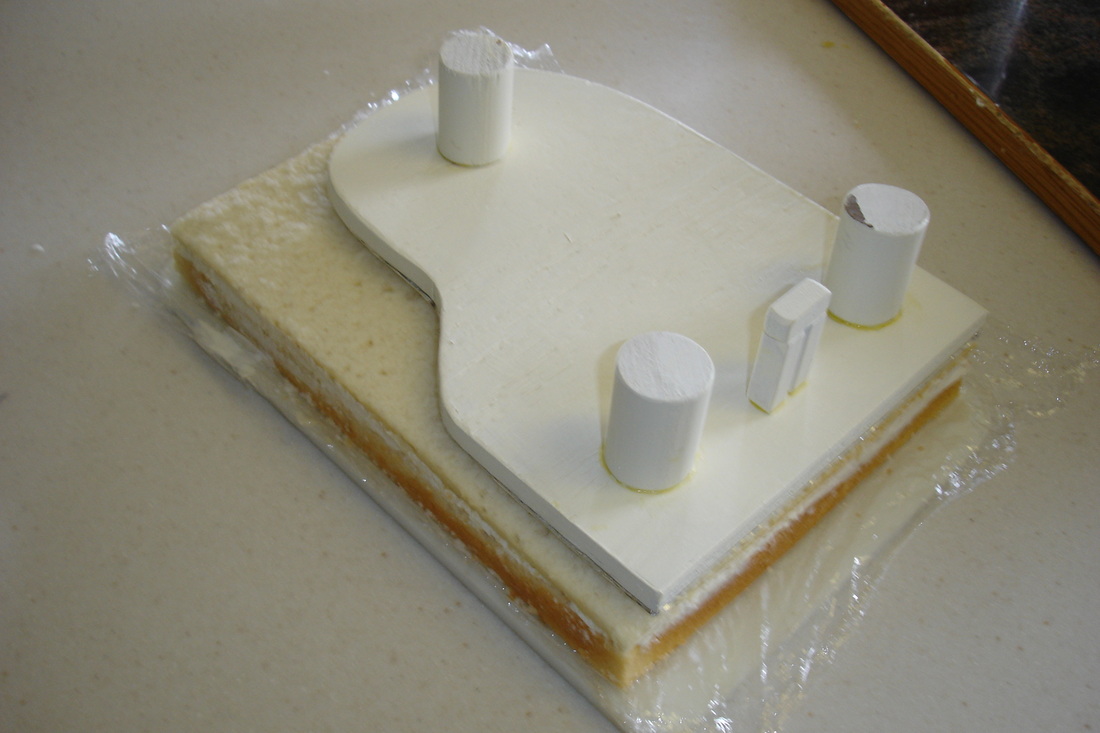
I cut out a portion for the keys and then frosted the whole thing.

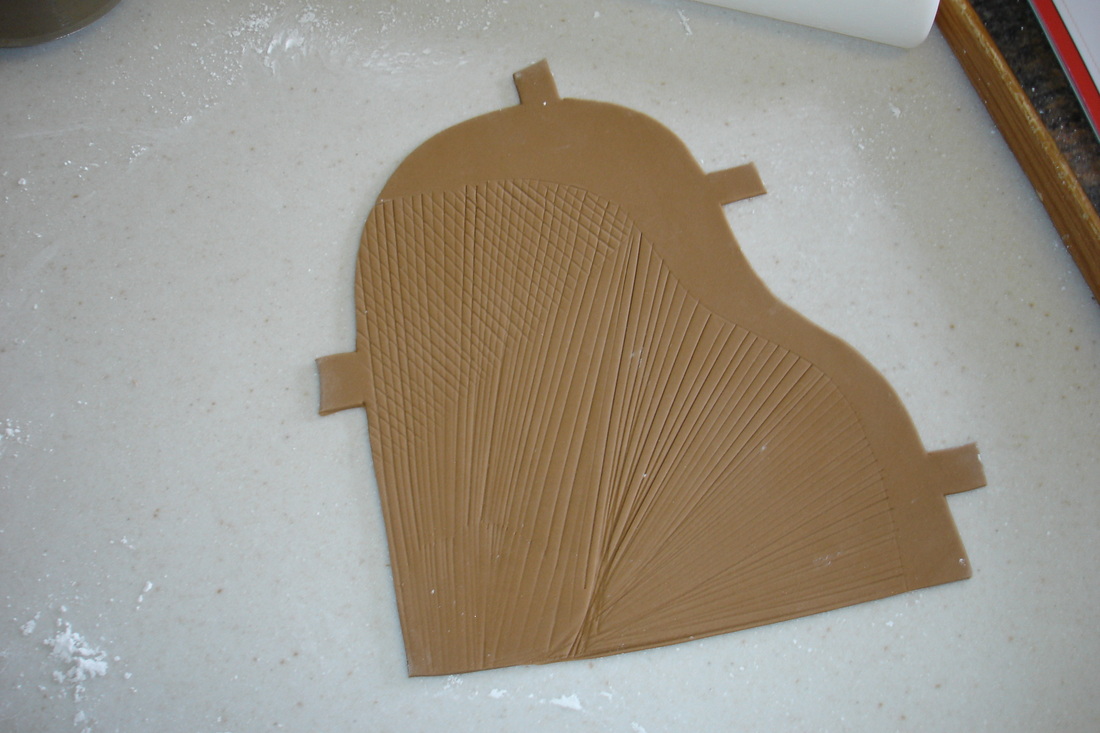
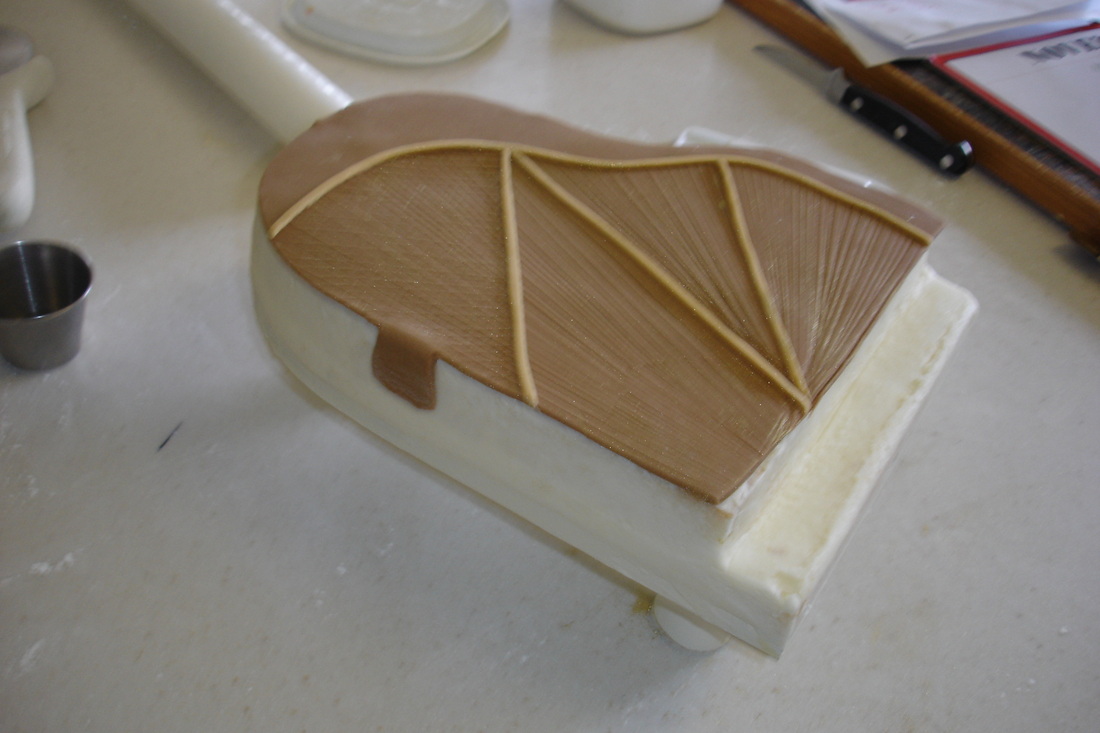
I let the cake firm up overnight in the fridge and got to work on the fondant. Now I did something rather silly here. I've never had a problem with fondant peeling away, but I've also only rarely pieced panels of fondant together to cover a cake. In my experience, fondant is more likely to tear than separate once it has been bonded with a little water. But I have seen far too many episodes of Cake Boss where the pieces just peel away. I was nervous that might be an issue, so I decided to make some tabs that would hang over the sides and give the side fondant some added support. This is completely unconventional (as far as I know) but seemed a good idea at the time. I rolled the tabs out pretty thin after taking this picture because I didn't want them showing through.
I then used my dough scraper to make the 'strings' for the inside o the piano. I didn't worry about that area where all the lines crossed because I knew it would be mostly covered up by a different panel.
I then used my dough scraper to make the 'strings' for the inside o the piano. I didn't worry about that area where all the lines crossed because I knew it would be mostly covered up by a different panel.
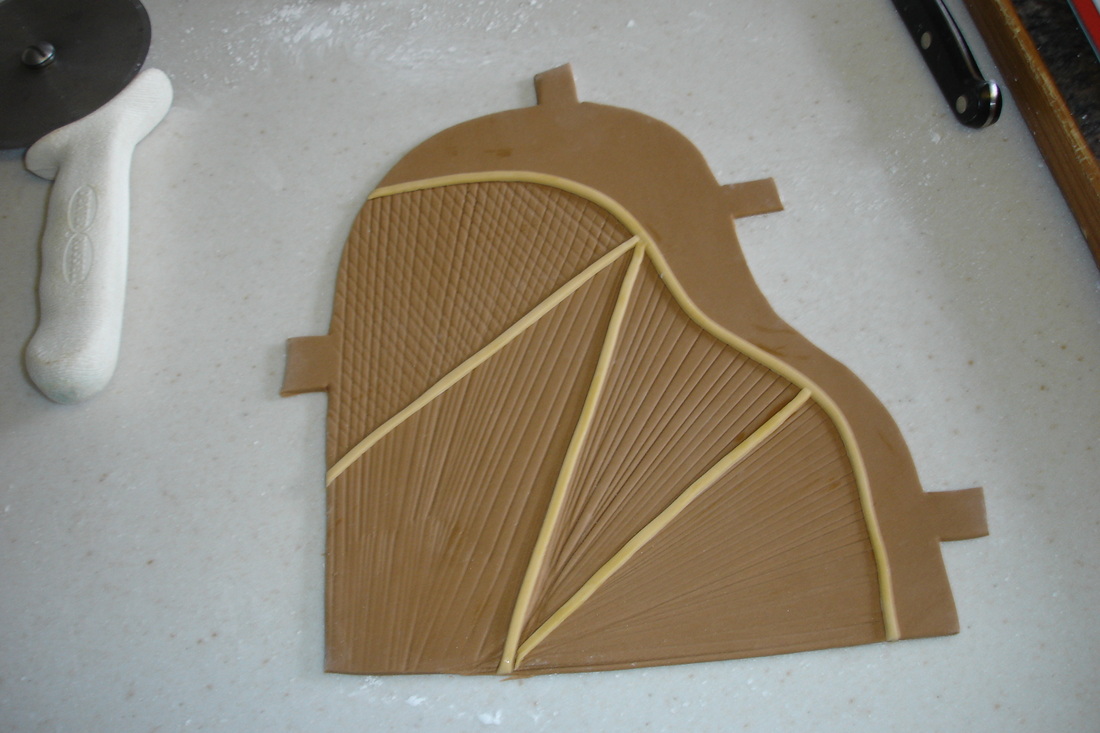
I rolled out some lighter tan and cut a small strip to start adding detail work.
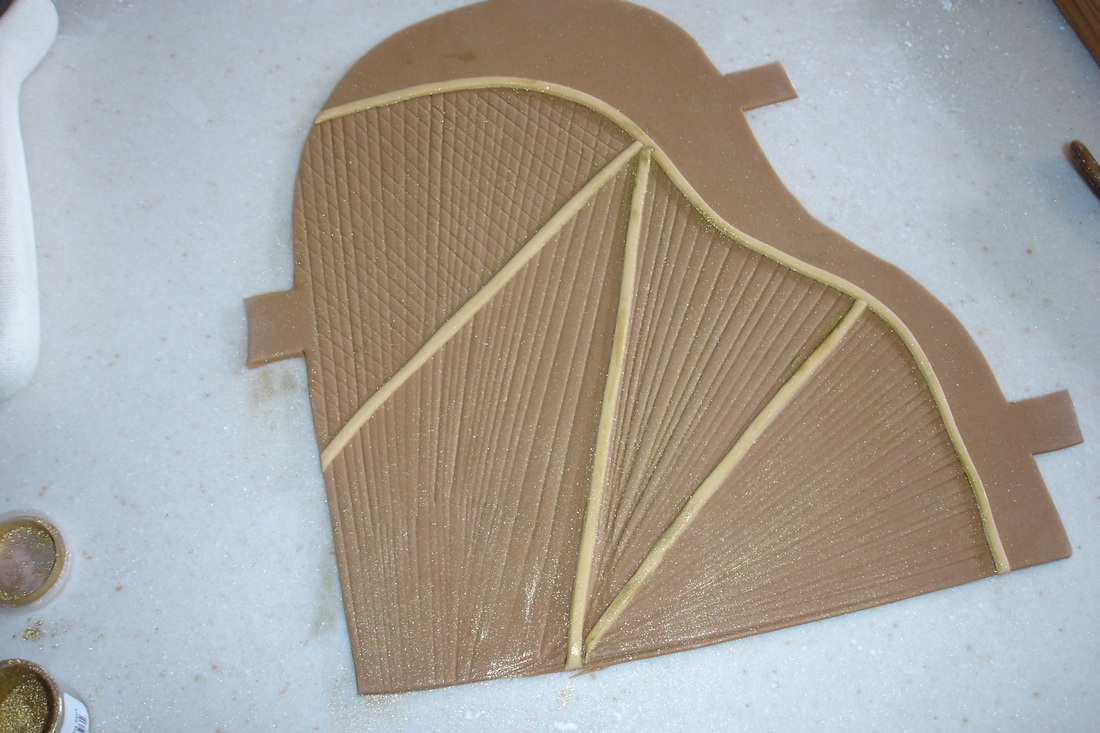
Then I used a dry paint brush and dusted it gently with some gold so it shimmered.
Time to put it on the cake...
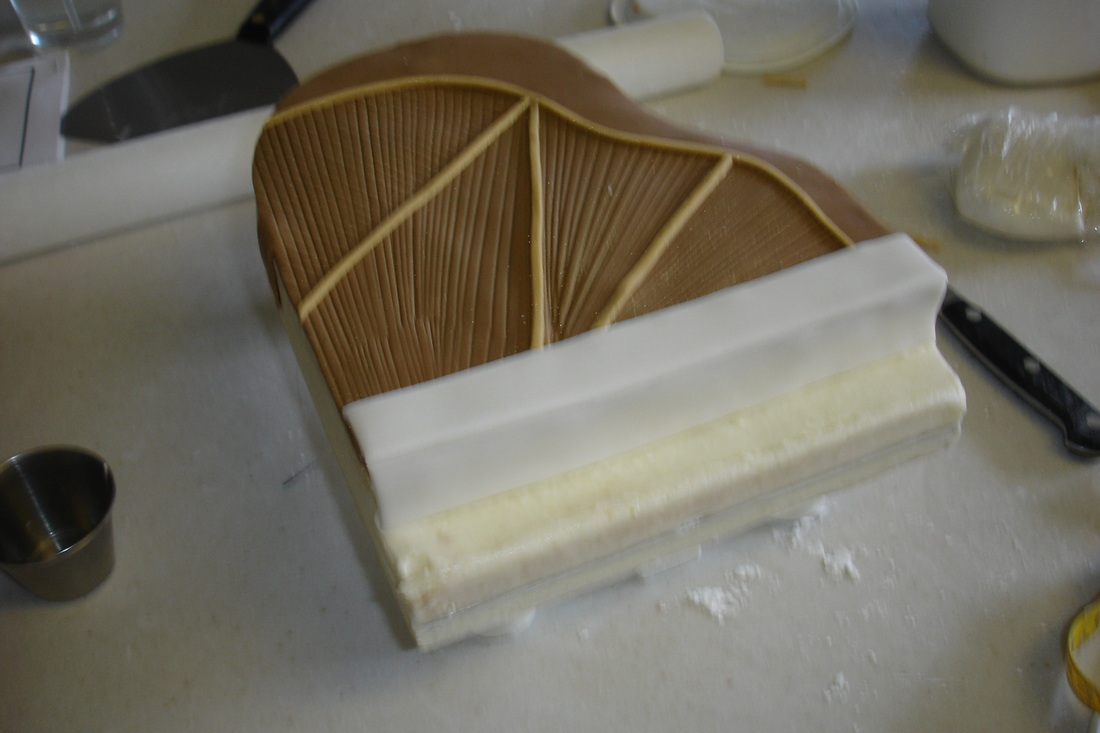
Now I started adding fondant details... a couple of white panels here....
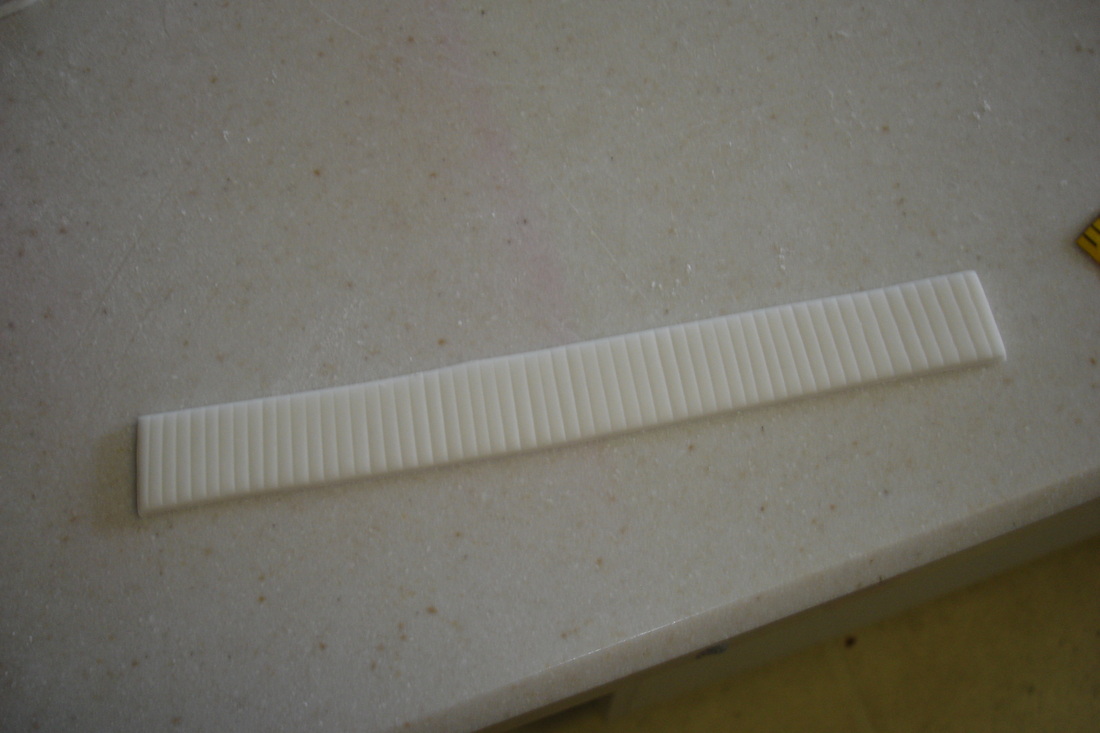
A keyboard there... For the keyboard I just cut out a thin rectangle to fit the cake and used a razor blade to make slight indentions for the keys.
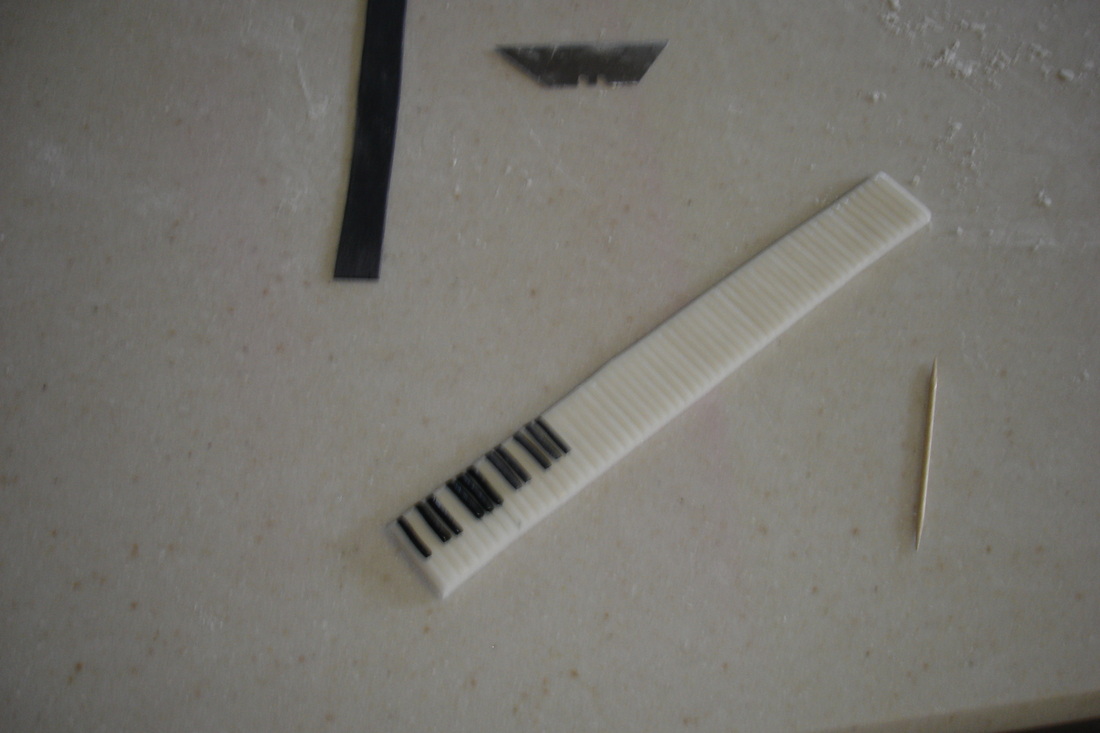
I wanted the details to really bring the cake to life... black keys came on next. I 'glued' them on using a bit of water (I glued all the panels together by slightly moistening them with water before I put them on the cake).
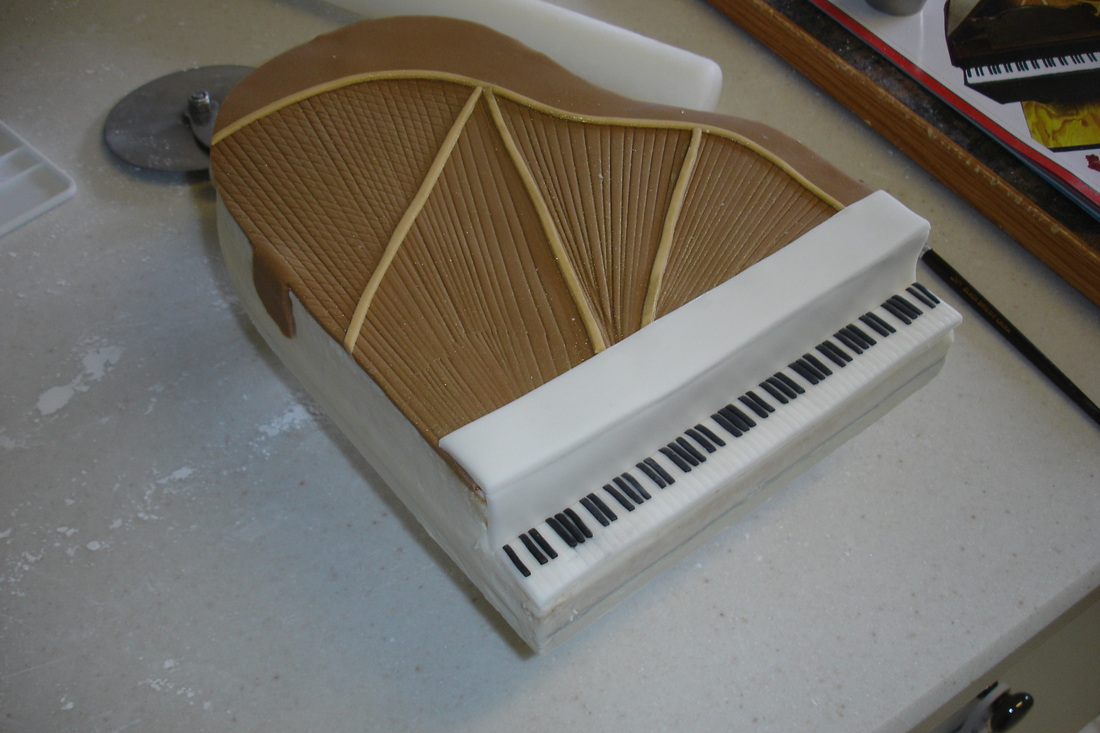
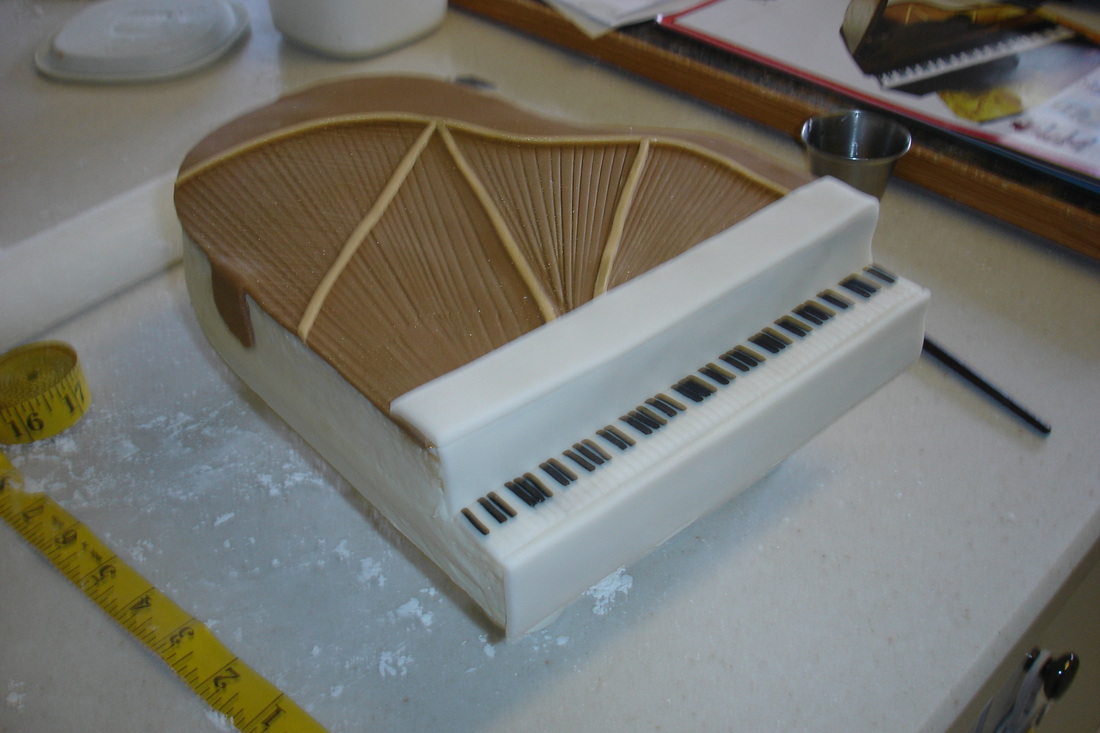
Add another panel to the bottom and it's really starting to take shape...
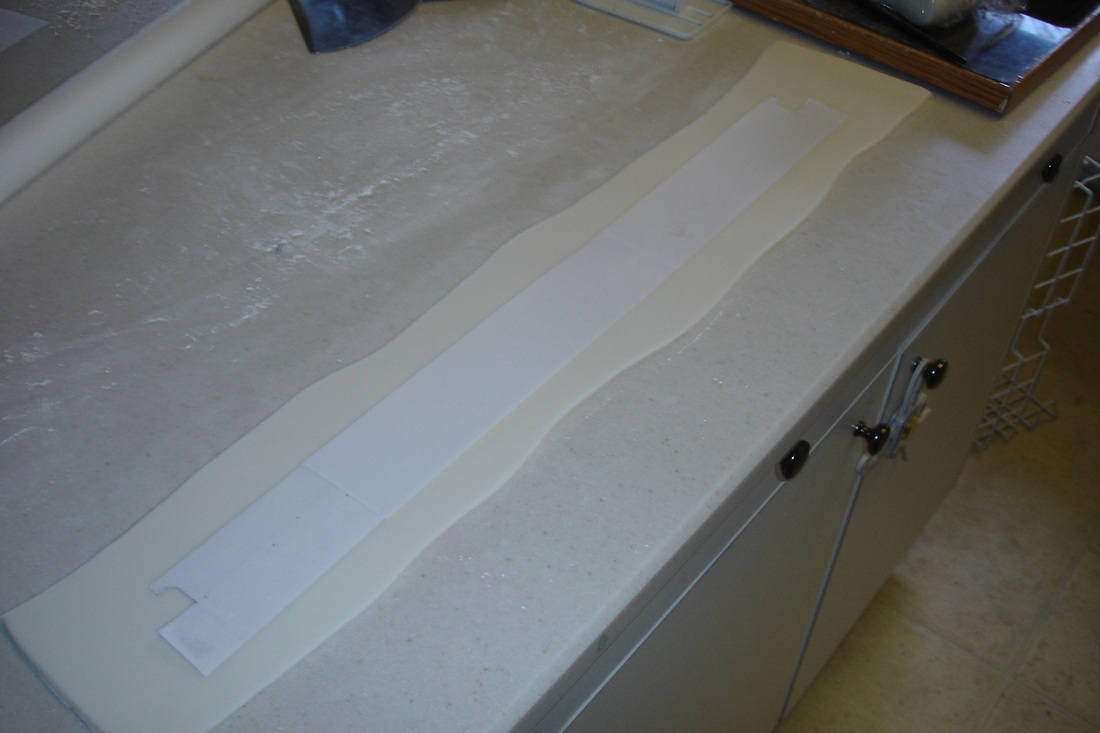
All the panels that I had made so far I just measured using a tape measure. But the sides of the cake needed a bit more precision, so I made a paper cutout to use as a guide.
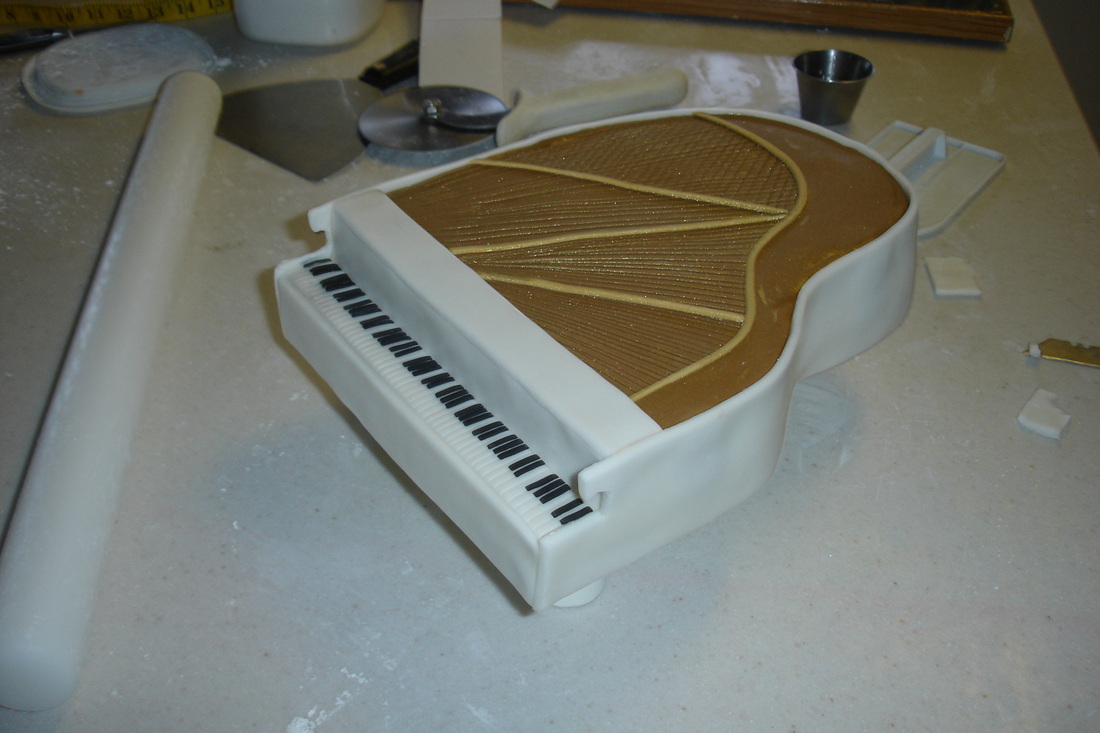
I moistened all the edges that would touch the side panel (as well as the butter cream side of the cake and the hang down tabs...and attached the side. After it was attached, I immediately put the whole thing in the refrigerator in the hopes that it would firm up and hold together.
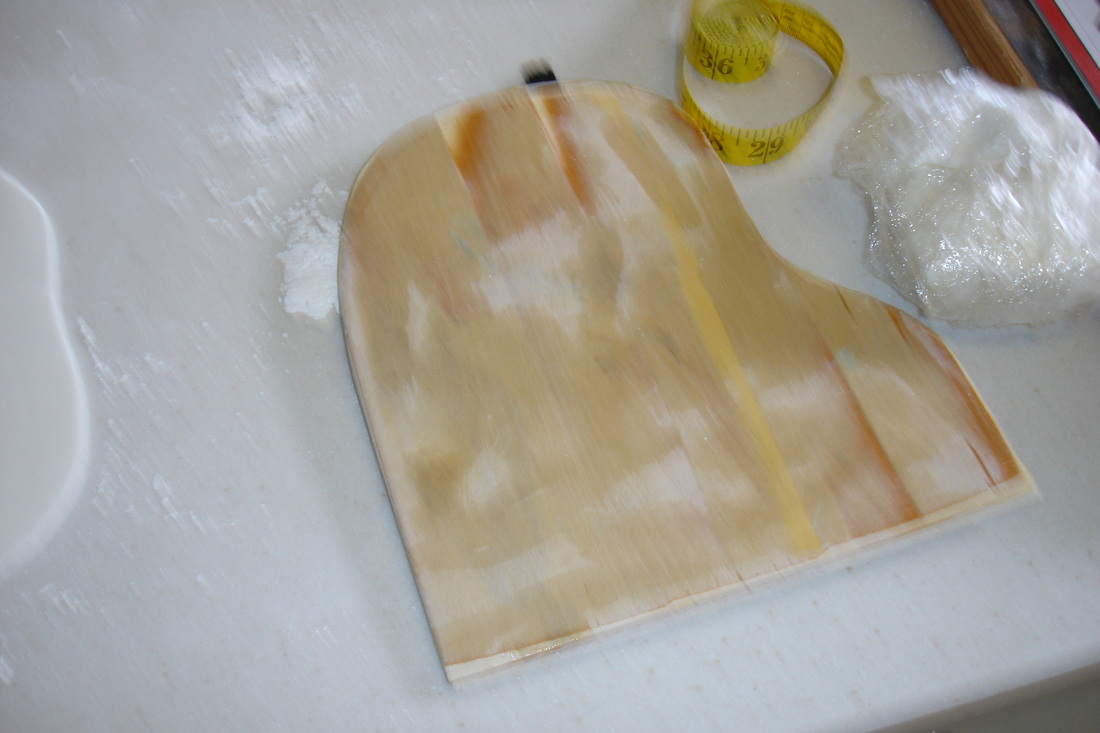
This was the board that the mother of the groom made for the top of the cake.
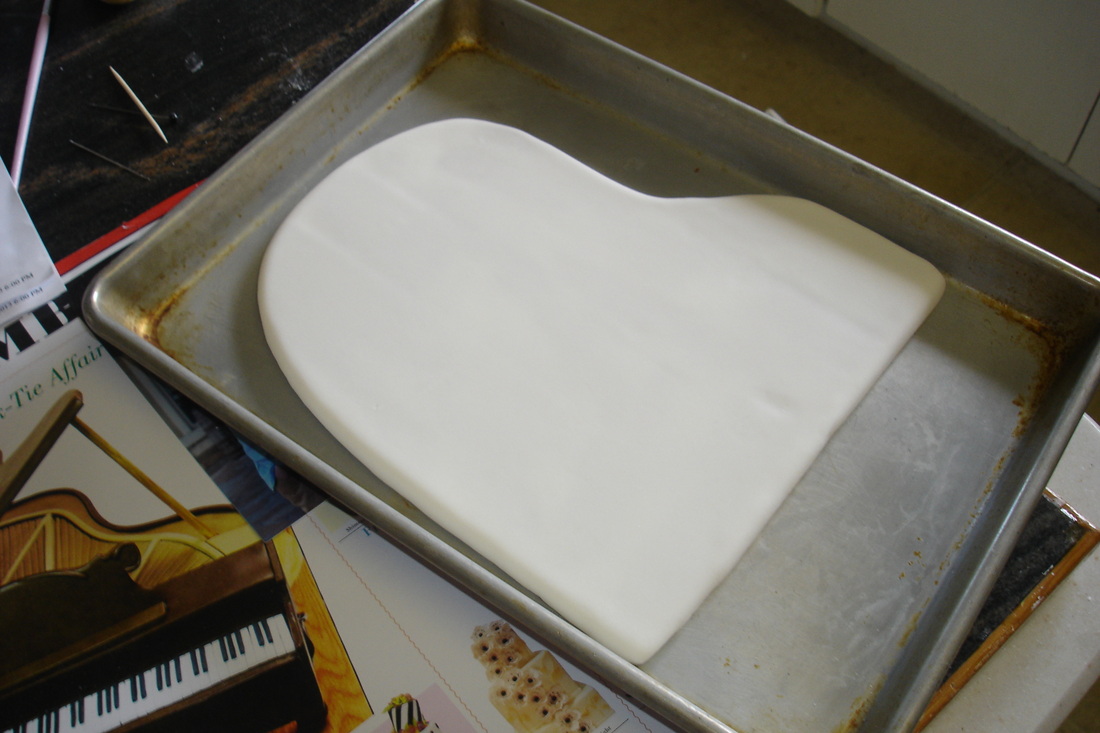
I added a bit of gum-tex to the fondant that I used for the top, and all the other details. The gum-tex causes the fondant to dry stiff so the details were nice and firm. I brushed the entire board with water and covered it with white fondant. Then I set it aside to dry.
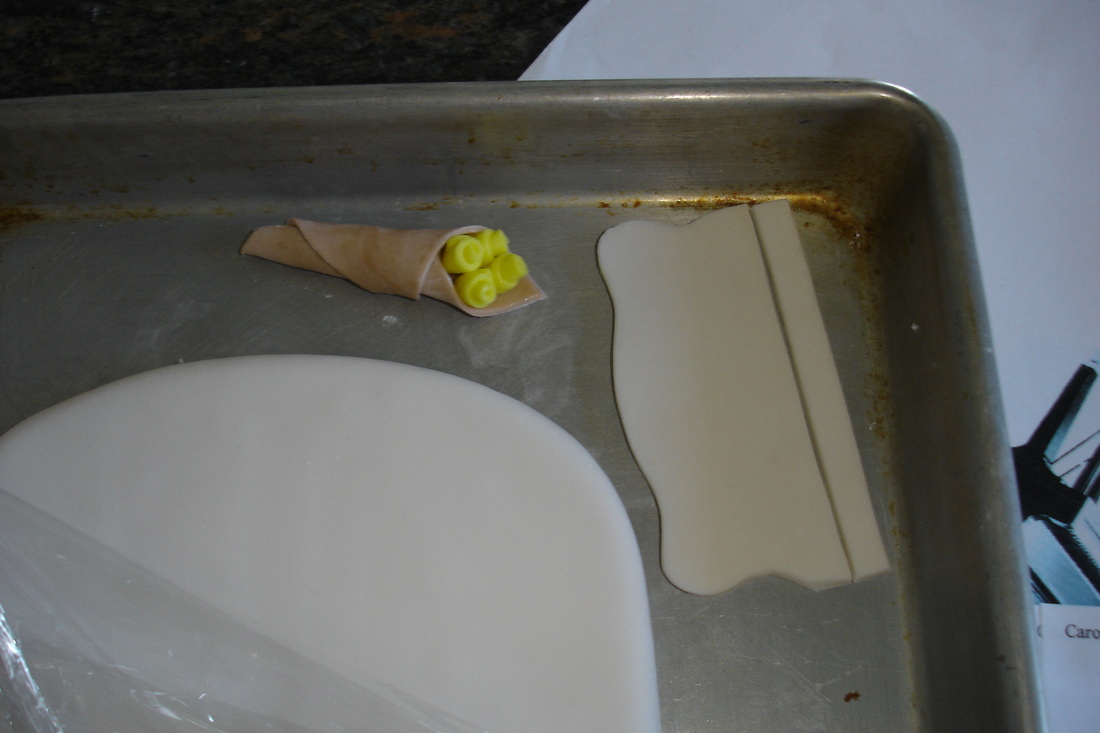
Then I made some more small details...the music stand and the flowers for the top of the piano.
Time to start making the musician. I'd never made a fondant person before so I was a bit nervous about this. Luckily, I recently found a great resource online. Her name is Liz Marek and she is AMAZING! I stumbled across her tutorial for making a unicorn cake topper and it was wonderful...so I went online to see if she could help me make a fondant man. This is what I found: http://www.youtube.com/watch?v=v4di1fSfB10&list=UUskIPGdQ2oNmfm1UQgRwboQ
Her tutorial was great and very helpful. The only thing that I did differently was adjust the clothes because I needed him in a tux. I looked up some fondant tuxedo's and copied their details to make the difference. I also waited until the last step to make the arms, as you will see in a bit.
I started the cake four days before the actual event. Usually I won't go longer than three days prior but there was so much here that I was unsure of. I wanted a buffer just in case I had a cake emergency. I also had to time everything right because some things needed to sit overnight (like the frosted cake before I started the fondant work). This man was another example of that. I couldn't start him early because I didn't know exactly how big the cake was going to be and I wanted him the right size. But he had to sit overnight and dry before I moved on here...so I had to plan out all the timing.
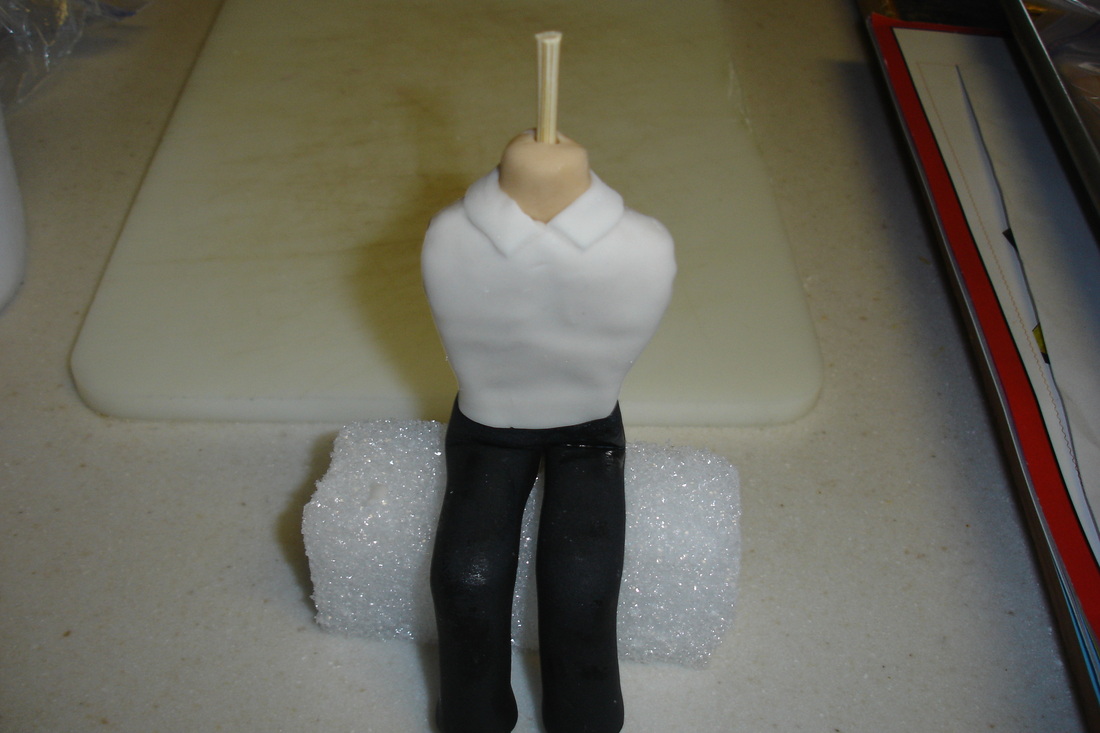
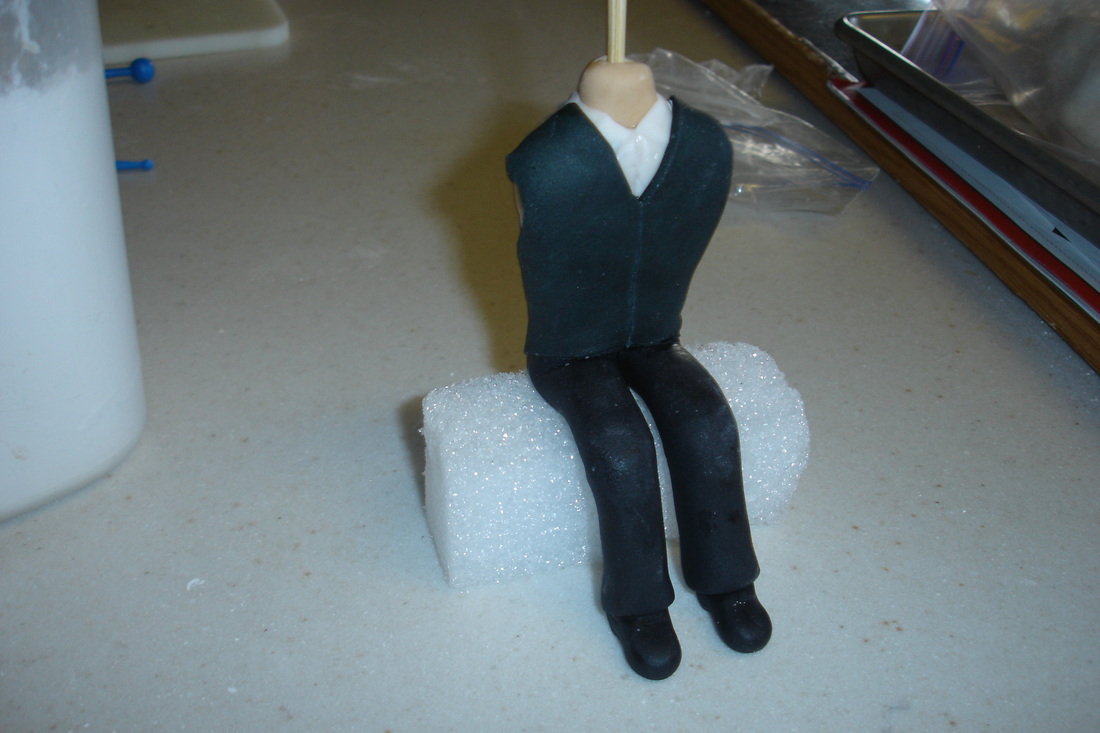
After he dried overnight, I started adding the clothes. I actually ended up taking this black jacket off and redoing it because it was too short.
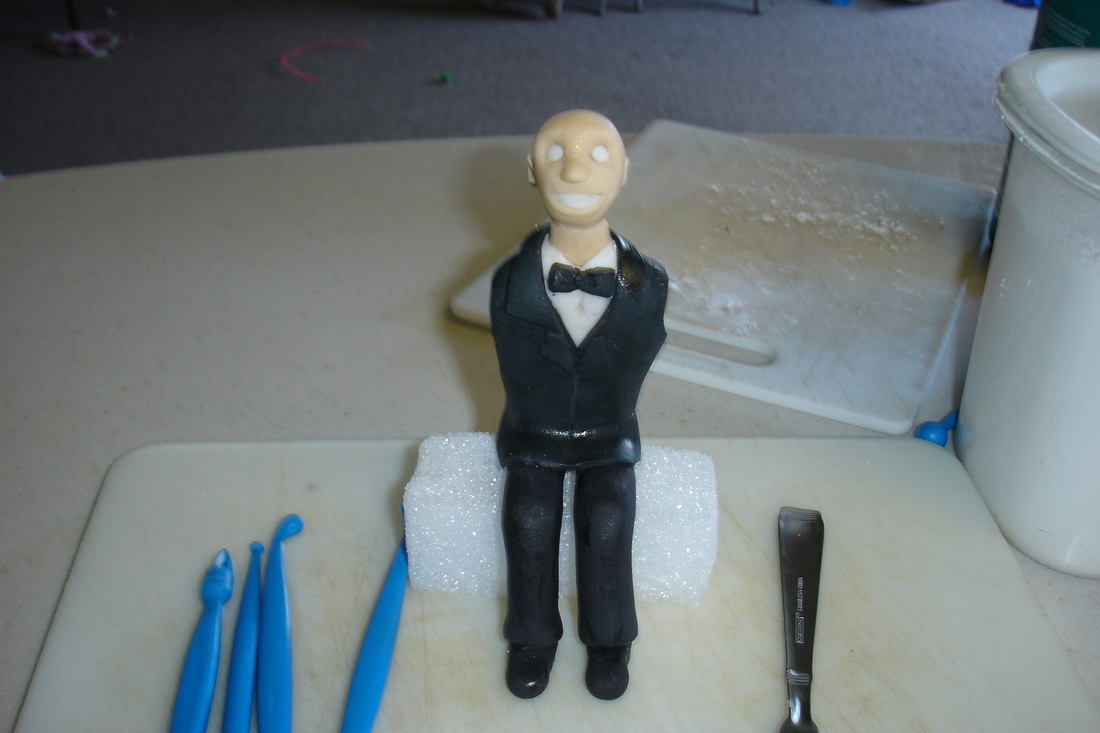
Little by little I added more details...

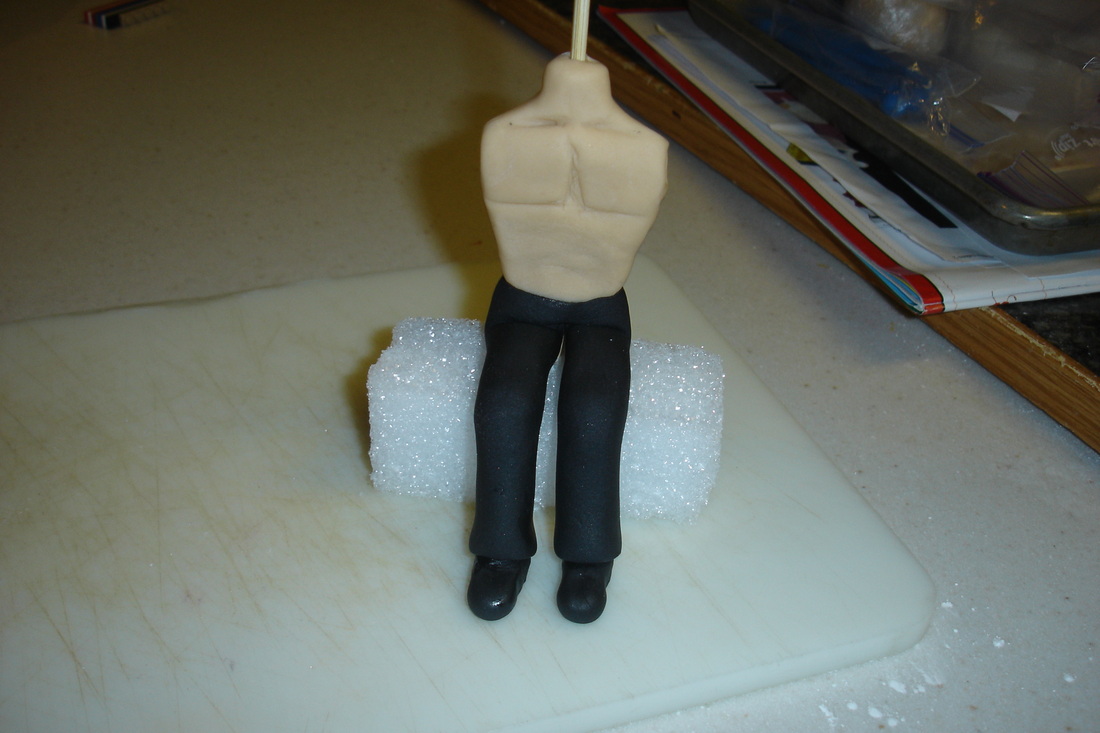
I saved his arms for last. I really wanted him playing the piano so I needed the finished cake as a guide so his arms were the right height.
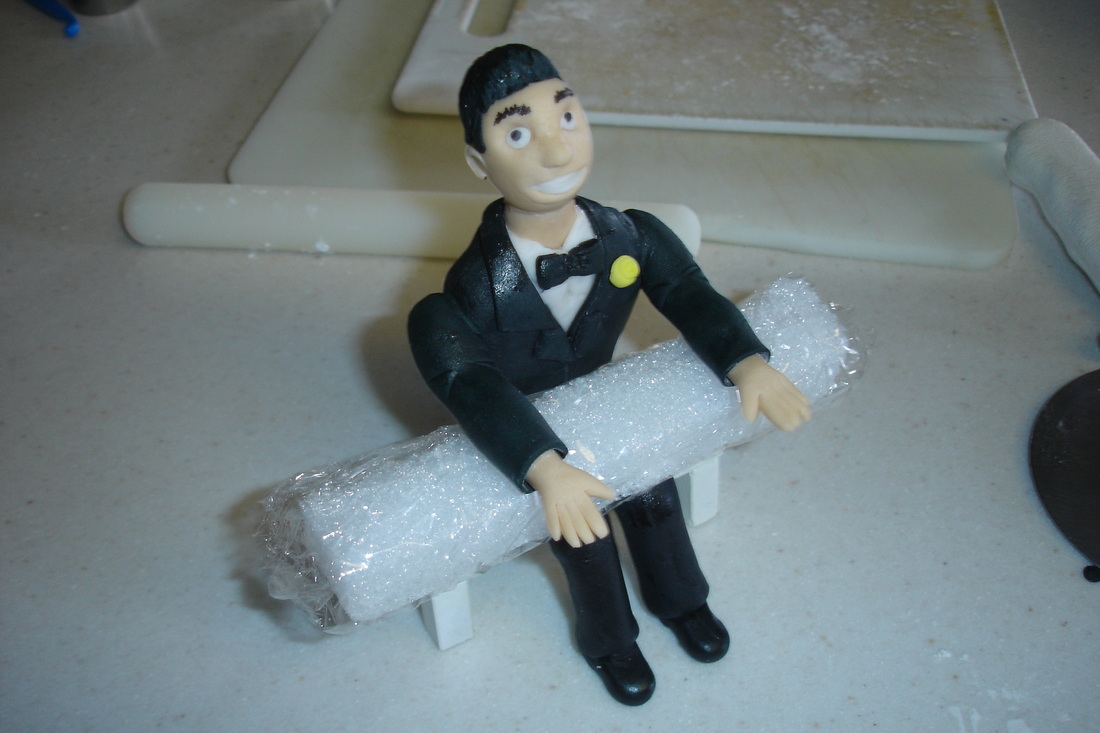
After I had the arms figured out, I cut out a foam piece to hold them at the right height while he dried and until the event. I covered the foam in plastic wrap because I didn't want little bits of foam getting on him.
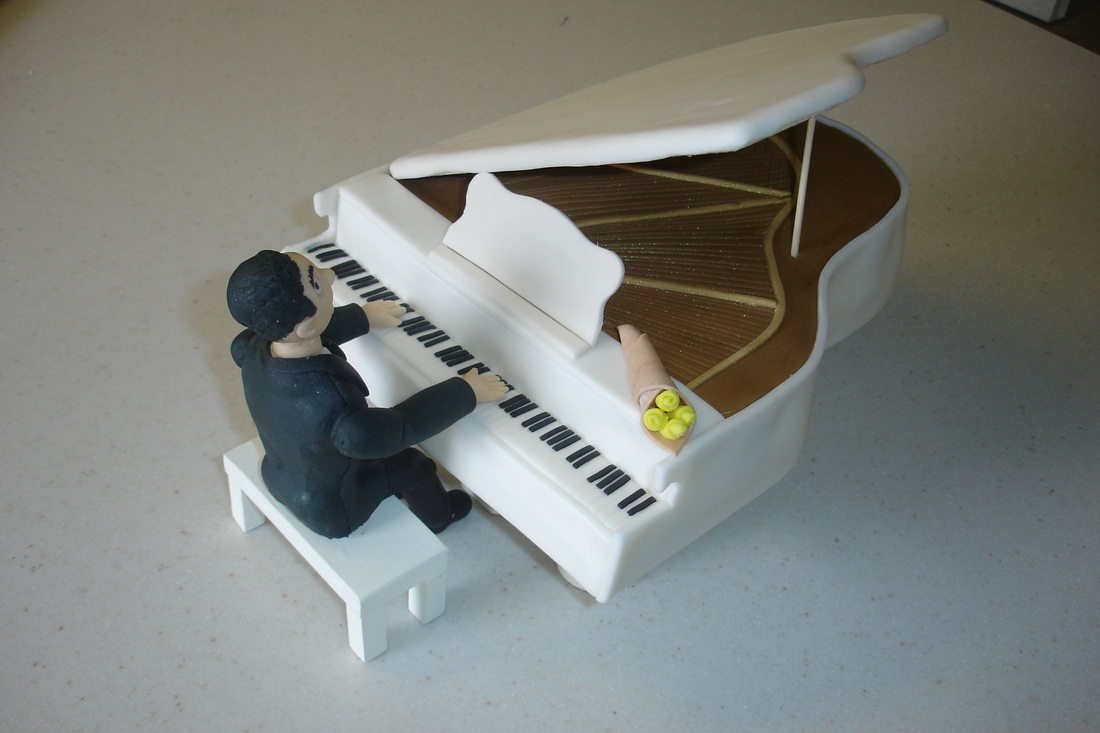
Finally I fitted the lid for the cake and readied the whole thing for the reception. I had my husband drill a small indentation in the wood of the lid so the stick had an area to grab. Then I put in the stick and gauged the height. I took off the lid again so it didn't get messed up before the event. Measuring the height of the stick ended up not working because when I got it set up at the event you could see the underside of the lid. And it didn't look good. So I ended up cutting a couple more inches off the stick and re-positioning it.
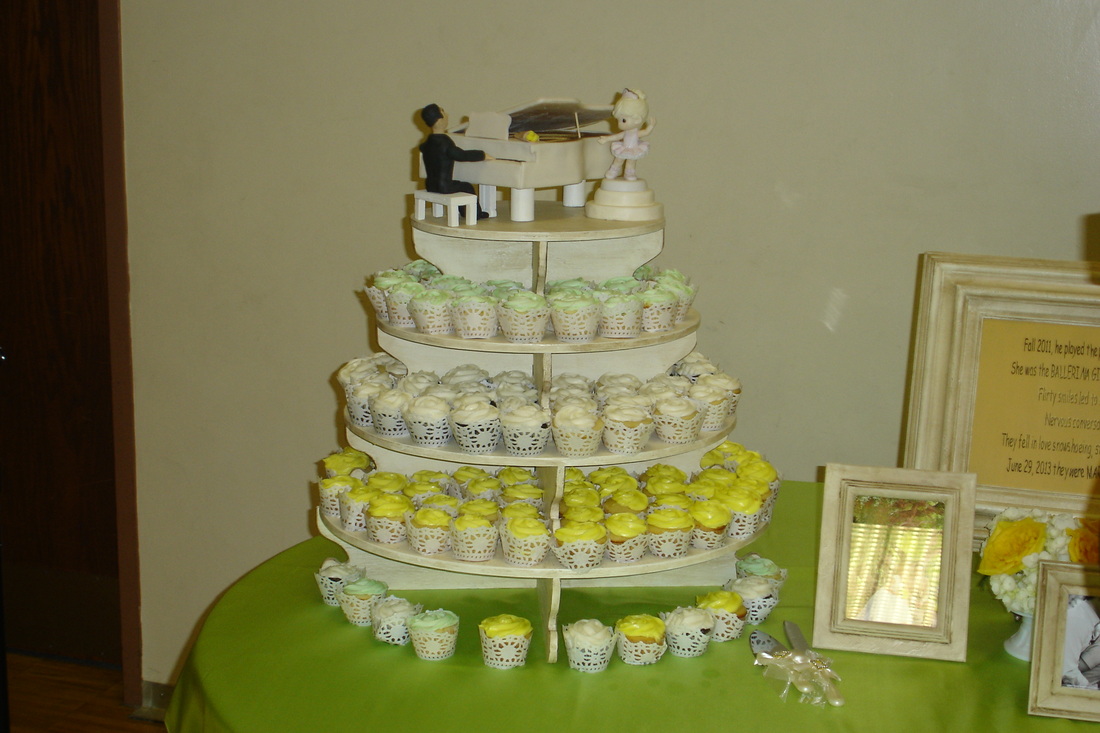
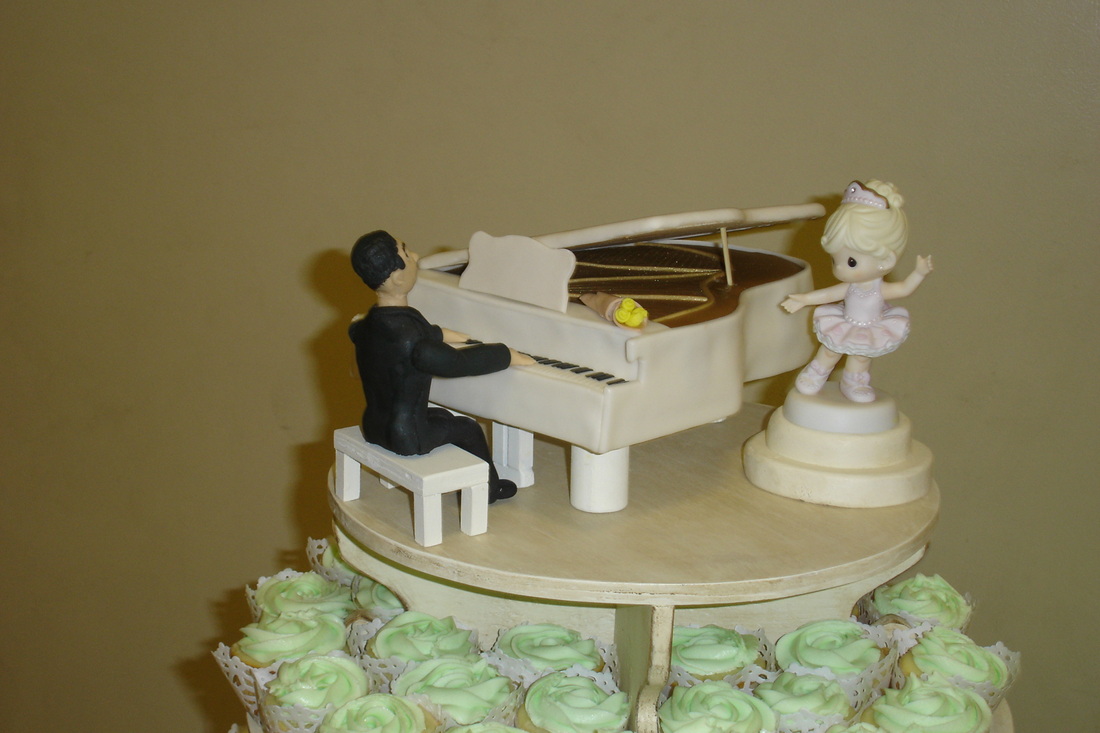
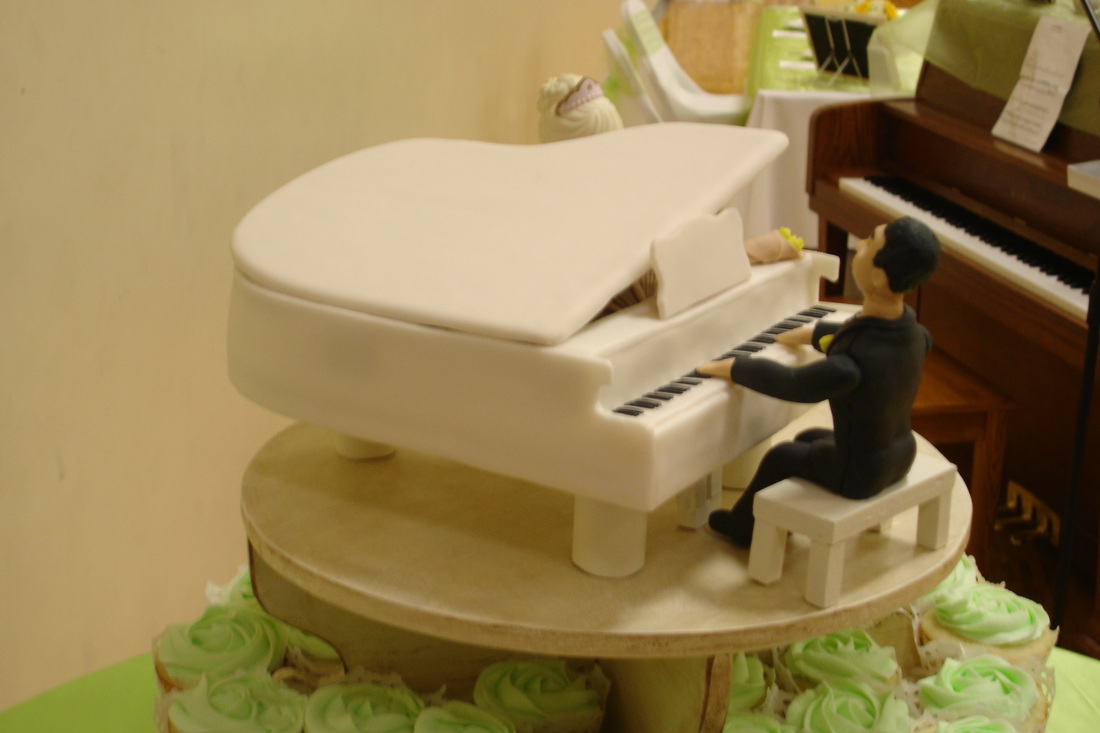
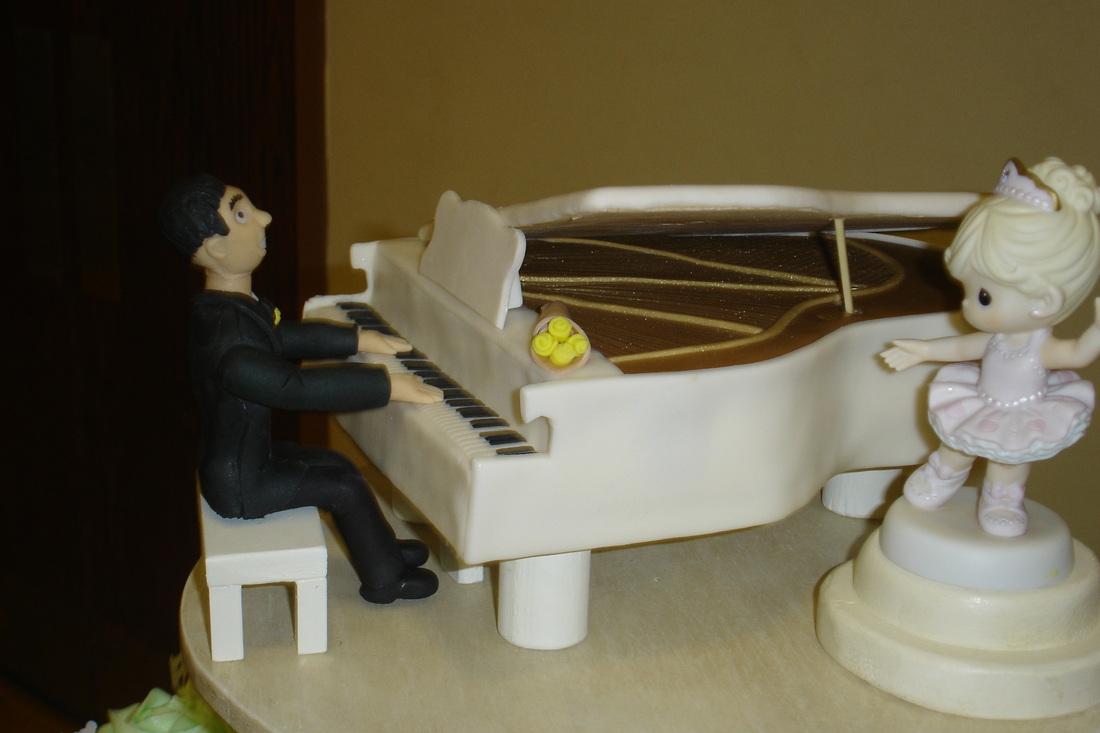
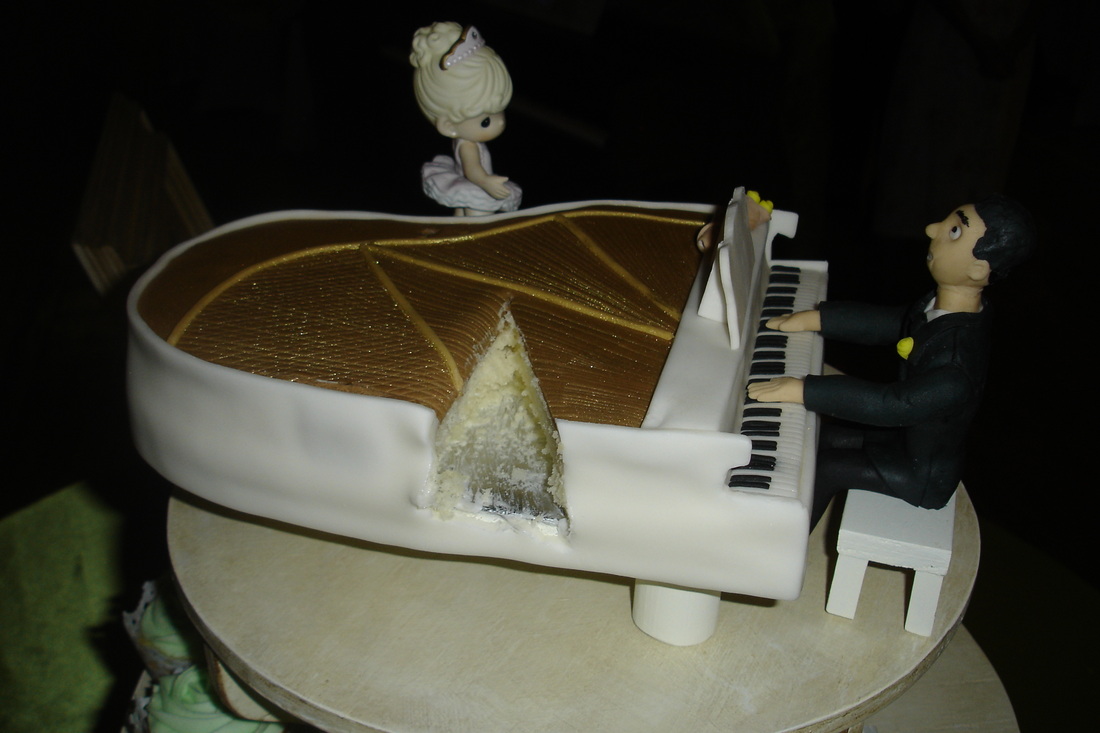
The is the finished product with the cupcake stand that they made. They also added the ballerina. The groom met the bride while playing the piano for an event in which she danced.
You can see in this one how much shorter I cut the stick.
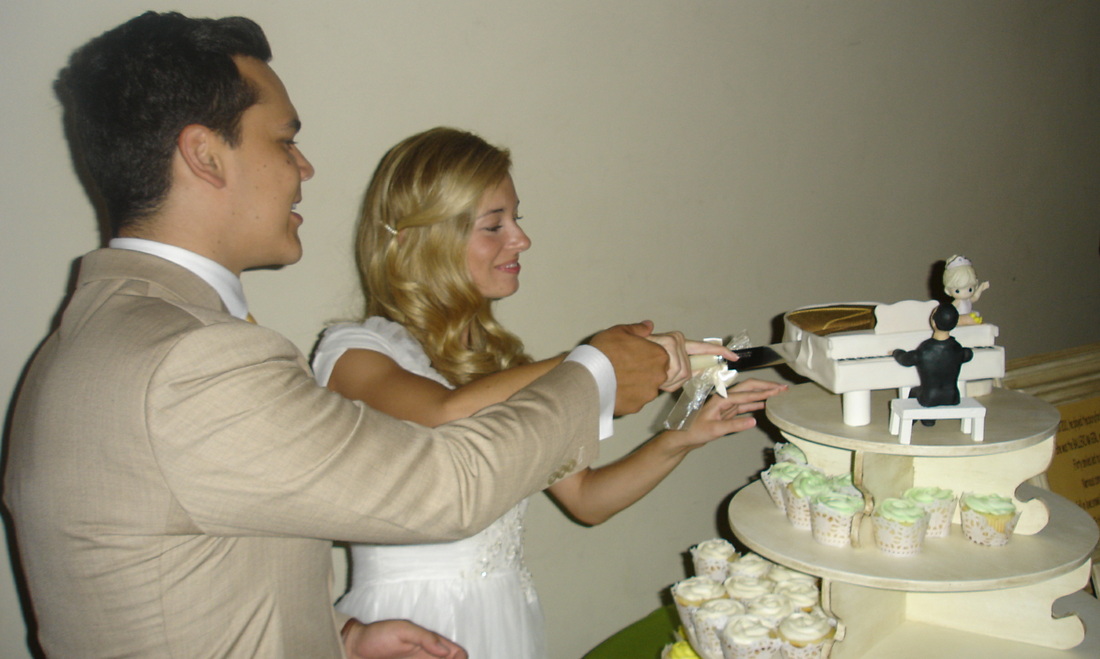
As a rare treat, I even got a picture of the bride and groom cutting the cake.
Overall it was so much fun and I was really grateful for the opportunity. I've wanted to do a piano cake for years so I was really happy with this one.
 RSS Feed