
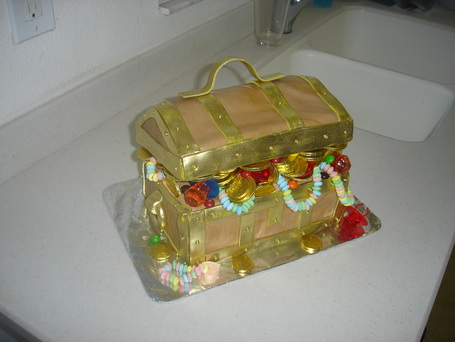
I'm anxious to get to the Sand Castle Wedding Cake, so I'm going to zip through this one. I'm still associating nausea (morning sickness) with anything cake, so forgive the brief explanations. I'll get back on track as soon as I possibly can.
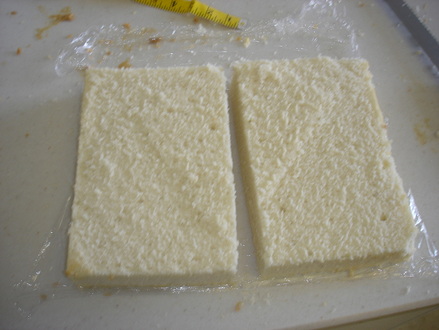
I started with one 12 inch by 12 inch by 2 inch cake. I cut it in half and cut off three inches of each of the sides. So I was left with two 6X9X2 inch pieces. This will form the base of the trunk.
I started with one 12 inch by 12 inch by 2 inch cake. I cut it in half and cut off three inches of each of the sides. So I was left with two 6X9X2 inch pieces. This will form the base of the trunk.
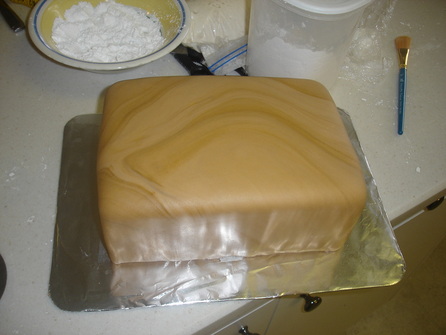
I put the two pieces together and frosted them. Then I made some brown fondant to make the chest. I wanted it to be a darker brown, but ran out of food coloring and didn't have the time to go get more. I got the marble effect by not mixing the color in completely. I covered the base.
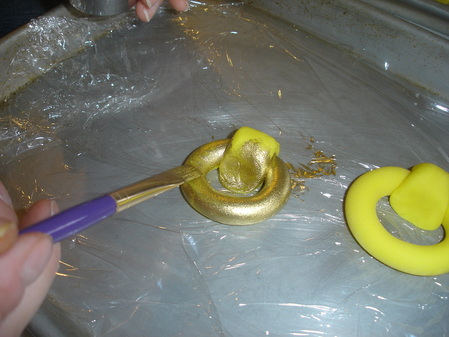
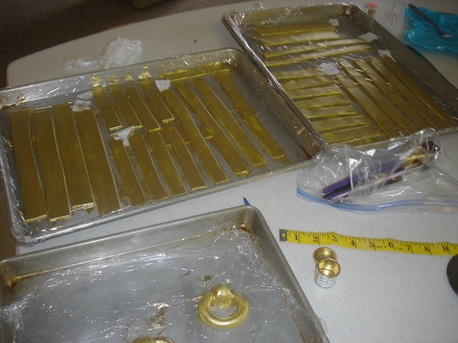
The biggest part of this cake is the details. I started by cutting strips of yellow fondant (to be painted gold). These were used as the metal bands. I measured the edges of the cake so I knew how many to cut.
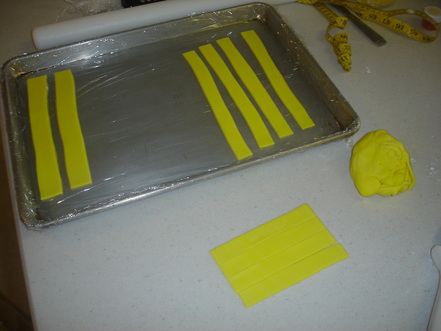
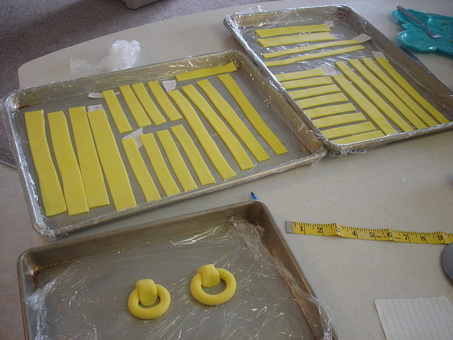
I actually mapped out the areas and numbered them, so I knew which pieces were for which part on the chest. The small white papers showing in the next pic are the numbers that helped me keep track of the pieces. I also fashioned the handles.
Next I used an edible gold dust mixed with clear vanilla to paint the pieces gold.
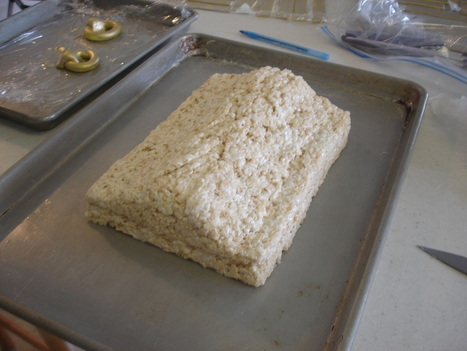
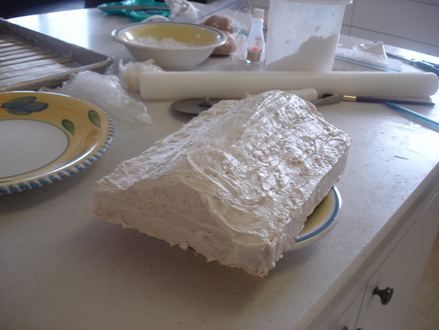
I used Rice Crispy Treats to make the lid. I love using them because they are easy to mold and fun to eat when the cake is cut. :-)
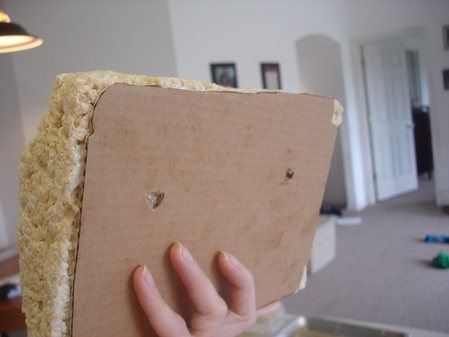
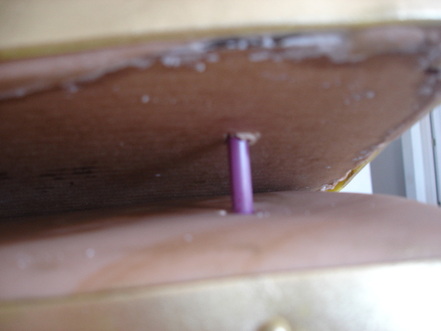
Next I needed to create a way that I could prop the lid partially open. I cut a cardboard rectangle, with two holes for the dowels, and fastened the lid to it with some frosting. The wholes will catch on carefully placed dowels and will hold the lid partially open. (note, this was cake cardboard. I didn't bother to cover it with foil but certainly could have)
Next I covered the lid with frosting and covered it with more marbled fondant. I could have gotten it a lot smoother, but I was so sick I just didn't care. I really just needed an 8 year old's birthday cake and wanted it done.
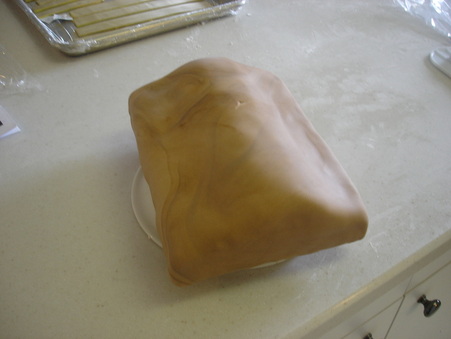
It's so lumpy it's laughable. Oh well. Better next time...when I'm not pregnant. :-)
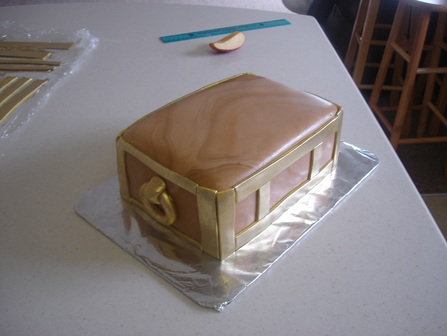
Next I started laying on the 'metal' bands. I did this simply by brushing the area with a wet brush and laying them on. Same with the handles. (Royal Icing can be used for heavier decorations). I also added rivets by pressing gold decorating balls into the fondant (and using a bit of buttercream to hold them in place).
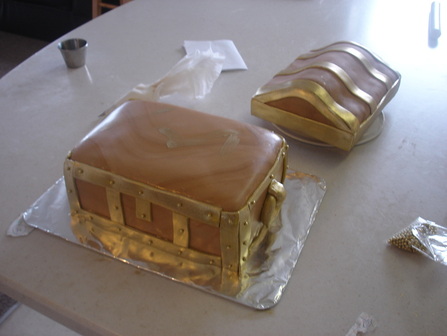

I measured the dowels to be about an inch above the base cake. Then I just lined them up with the holes in the cardboard, and lowered the lid into place.
Lastly, I filled up the gap with candy. I used chocolate coins, candy necklaces, ring pops, and skittles. It was a huge success. The kids all loved it.
 RSS Feed